

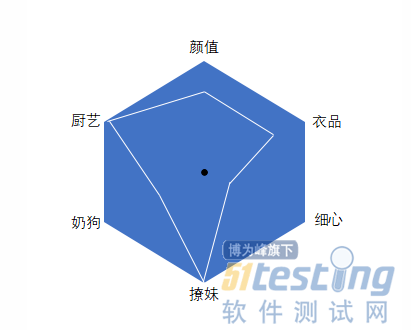
最新又接到新的活动需求啦,是一个测试类的游戏。 大概的看了整个需求,这个活动的难点在于结果页面的六边形指标怎么实现。
效果demo类似
分析
背景
首先,这是用户对应六个属性值的等边六边形,等边六边形这是一个很关键的点;为什么是等边六边形呢,因为用户留个属性的峰值的一样的,起点也是一致的。
中心点
这个六边形的中心就是整个圆心的中心位置
六个属性坐标位置
我们需要各自的属性值算出对应的坐标位置
绘画等边六边形
我们假设要绘画边长为240长度的等边六边形; 我们需要简单的计算下;

我们把底部切成三块,一个三角形+矩形+三角形
用css方式把它画出来。
相信三角形的画法大家应该都很清楚了,这里就不重复讲基础的东西
dom
<view class="six-bg"> <view class="box1"></view> <view class="box2"></view> <view class="box3"></view> </view> |
css
@sixWidthRPX: 208rpx; // 240*cos30° @sixHeightRPX: 120rpx; // 240*sin30° @sixWidthBigRPX: 416rpx; @sixHeightBigRPX: 240rpx; .six-bg{ padding: 167rpx; .box1{ width:0; border-left: @sixWidthRPX solid transparent; border-right: @sixWidthRPX solid transparent; border-bottom: @sixHeightRPX solid #6c6; } .box2{ width: @sixWidthBigRPX; height: @sixHeightBigRPX; background-color: #6c6; } .box3{ width:0; border-top: @sixHeightRPX solid #6c6; border-left: @sixWidthRPX solid transparent; border-right: @sixWidthRPX solid transparent; } } |
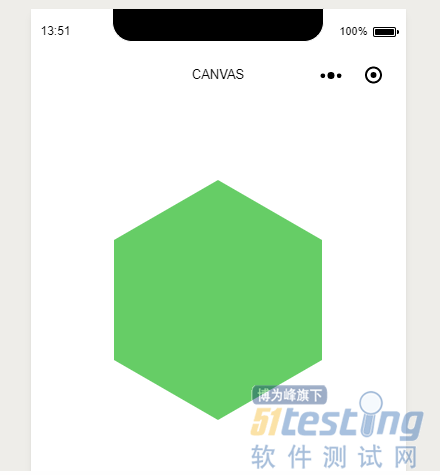
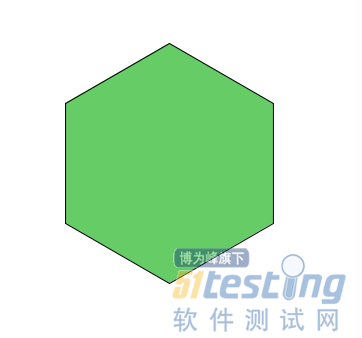
效果图
根据属性值画点连线
假设我们把那个属性值的峰值都定为10。我们知道等边六边形的6边长度都为240。那我们的每个单位就是24。
我们先假设6个属性值都满了,那么
data = { sixData: { one: 10, two: 10, three: 10, four: 10, five: 10, six: 10 } } |
我们找下等边六边形的圆形点。
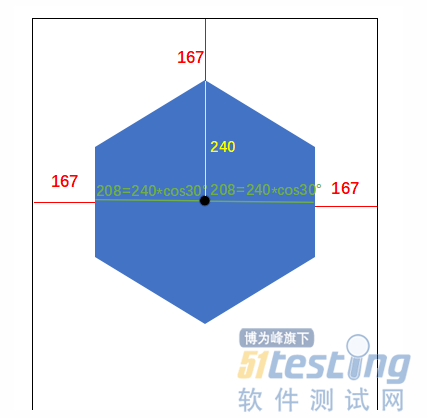
X轴位置 167+208 = 375
Y轴位置 167+240 = 407
6个坐标位置
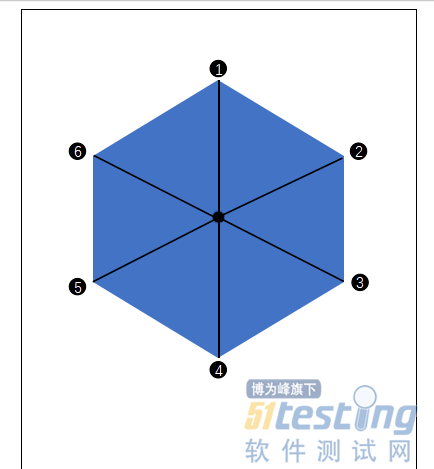
第一个点的坐标和第四个点的坐标是最容易计算的,我们先把这两个点的坐标算出来;
const unit = 24 // 单位 const centerDotX = 375 // 中心点 const centerDotY = 407 // 中心点 // 第一个点 位置 let dotOne = { x: centerDotX, y: centerDotY - this.sixData.one * unit } // 第四个点 位置 let dotFour = { x: centerDotX, y: centerDotY + this.sixData.four * unit } |
第二、三、五、六点的坐标我们就需要用到三角函数了;
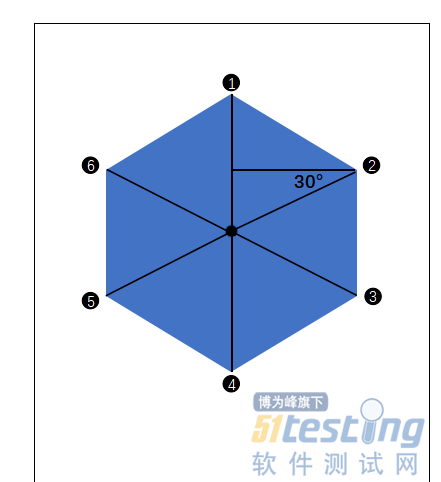
我们观察下这个图,发现 2、3、5、6点都有30度的夹角;
第二点坐标
const lineLongTwo = unit * this.sixData.two x = centerDotX + lineLongTwo*cos30 y = centerDotY - lineLongTwo*sin30 |
我们的js代码并没有cos、sin的方法;
这时候我们需要补一下Math函数的知识;
Math.sin(x) x 的正玄值。返回值在 -1.0 到 1.0 之间;
Math.cos(x) x 的余弦值。返回的是 -1.0 到 1.0 之间的数;
这两个函数中的X 都是指的“弧度”而非“角度”,
弧度的计算公式为:
(度数 * Math.PI) / 180;
现在我们可以算出6个点的位置了
const unit = 24 // 单位 const centerDotX = 375 // 中心点 const centerDotY = 407 // 中心点 // 第一个点 位置 let dotOne = { x: centerDotX, y: centerDotY - this.sixData.one * unit } // 第二个点 位置 const lineLongTwo = unit * this.sixData.two let dotTwo = { x: centerDotX + lineLongTwo * Math.cos((30 * Math.PI) / 180), y: centerDotY - lineLongTwo * Math.sin((30 * Math.PI) / 180) } // 第三个点 位置 const lineLongThree = unit * this.sixData.three let dotThree = { x: centerDotX + lineLongThree * Math.cos((30 * Math.PI) / 180), y: centerDotY + lineLongThree * Math.sin((30 * Math.PI) / 180) } // 第四个点 位置 let dotFour = { x: centerDotX, y: centerDotY + this.sixData.four * unit } // 第五个点 位置 const lineLongFive = unit * this.sixData.five let dotFive = { x: centerDotX - lineLongFive * Math.cos((30 * Math.PI) / 180), y: centerDotY + lineLongFive * Math.sin((30 * Math.PI) / 180) } // 第六个点 位置 const lineLongSix = unit * this.sixData.six let dotSix = { x: centerDotX - lineLongSix * Math.cos((30 * Math.PI) / 180), y: centerDotY - lineLongSix * Math.sin((30 * Math.PI) / 180) } |
现在我们来把点连成;我们可以采用 微信小程序canvas api 来绘制我们的六条线
先建立canvas dom
<view class="canvas-module"> <canvas canvas-id="myCanvas" class="canvas-class"/> </view> |
css布局
.canvas-module{ position: absolute; width: 750rpx; height: 750rpx; z-index: 2; top: 0; left: 0; .canvas-class{ width: 750rpx; height: 750rpx; } } |
canvas api文档 developers.weixin.qq.com/miniprogram…
绘制
const ctx = wepy.createCanvasContext('myCanvas') ctx.beginPath() ctx.moveTo(dotOne.x / 2, dotOne.y / 2) ctx.lineTo(dotTwo.x / 2, dotTwo.y / 2) ctx.lineTo(dotThree.x / 2, dotThree.y / 2) ctx.lineTo(dotFour.x / 2, dotFour.y / 2) ctx.lineTo(dotFive.x / 2, dotFive.y / 2) ctx.lineTo(dotSix.x / 2, dotSix.y / 2) ctx.lineTo(dotOne.x / 2, dotOne.y / 2) ctx.stroke() ctx.draw() |
位置坐标为什么要除以2呢?
因为canvas是以px为单位的
效果图
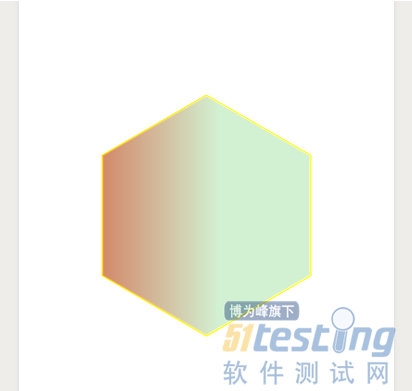
我们再给利用canvas属性,给它加上一点补一样的东西
我们给线加上颜色和宽度
ctx.setStrokeStyle('yellow') // 线条颜色 ctx.setLineWidth(2) // 线条宽度 |
填充渐变颜色
const grd = ctx.createLinearGradient(0, 0, 200, 0) grd.addColorStop(0, 'red') grd.addColorStop(1, 'white') ctx.setFillStyle(grd) ctx.fill() |
加上透明度
| ctx.setGlobalAlpha(0.7) |
效果图
最后我们再加上个动画,修改属性值,完成整个效果;
dom <view class="canvas-module" animation="{{animationData}}"> <canvas canvas-id="myCanvas" class="canvas-class"/> </view> <button @tap="goStart">开始canvas</button> |
css
.canvas-module{ position: absolute; width: 750rpx; height: 750rpx; z-index: 2; top: 0; left: 0; transform: scale(0); //新增样式 .canvas-class{ width: 750rpx; height: 750rpx; } } |
js
data = { animationData: {}, sixData: { one: 10, two: 7, three: 1, four: 6, five: 2, six: 8 } }; |
methods = { goStart () { var animation = wepy.createAnimation({ duration: 1000, timingFunction: 'ease' }) animation.scale(1, 1).step() this.animationData = animation.export() } } |
效果如下
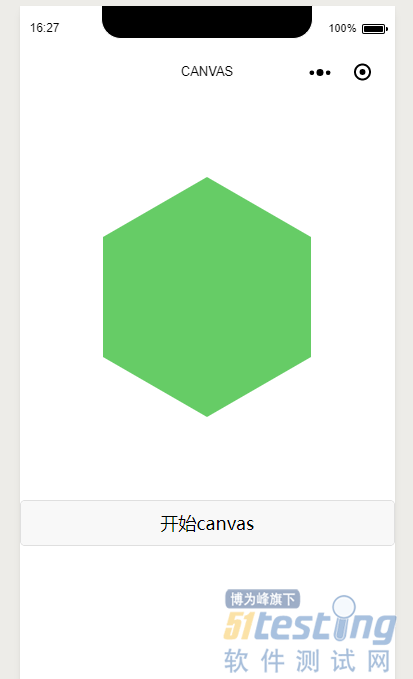
这样整个动画就算完成了, demo请前往github github.com/fishmankkk/…
其实背景图也是可以用canvas画的,有兴趣的小伙伴可以动手自己画一下
上文内容不用于商业目的,如涉及知识产权问题,请权利人联系博为峰小编(021-64471599-8017),我们将立即处理。


