
-
Qt编写串口通信程序全程图文讲解(二)(
2009-10-22 22:16:13
上一篇文章中已经介绍了实现最简单的串口接收程序的编写,这篇将对程序内容进行分析。
1.首先应说明操作串口的流程。
步骤一:设置串口参数,如:波特率,数据位,奇偶校验,停止位,数据流控制等。
步骤二:选择串口,如windows下的串口1为“com1”,Linux下为“ttyS0”等。
步骤三:读或写串口。
步骤四:关闭串口。
(我们上一个程序没有写串口和关闭串口的功能,打开串口也是在构造函数里完成的,因为那只是为了用最简单的方法完成串口程序的编写。在以后的文章里我们将会对它进行修改和完善。)
2.下面我们将按照上面的操作串口的流程,讲解第一个程序的编写。
第一,我们在写程序之前,应该浏览一下那6个文件,大概看一下它们里面都是什么内容,各个文件各个类之间有什么联系。在win_qextserialport.cpp文件中,我们看它的最后一个构造函数,会发现,串口可以在这里进行初始化。

Win_QextSerialPort::Win_QextSerialPort(const QString & name, const PortSettings& settings, QextSerialBase::QueryMode mode) {
Win_Handle=INVALID_HANDLE_VALUE;
setPortName(name);
setBaudRate(settings.BaudRate);
setDataBits(settings.DataBits);
setStopBits(settings.StopBits);
setParity(settings.Parity);
setFlowControl(settings.FlowControl);
setTimeout(settings.Timeout_Millisec);
setQueryMode(mode);
init();
}
它共有三个参数,其中第一个参数const QString & name,应该是串口的名字,是QString类型,我们可以用串口1即“com1”,不用过多说明。下面我们主要研究第二个和第三个参数。
第二,我们查看第二个参数的位置。
在Qt Creator的菜单中选择Edit->Find/Replace->All projects,如下图。

在弹出的对话框中输入要查找的内容PortSettings,如下图。

点击Search后,便能在下面显示出整个工程中所有PortSettings的位置。如下图。

我们点击第一条,可以看到在qextserialbase.h文件中有一个struct PortSettings,如下图。

我们双击这一条,进入相应的文件。如下图。

struct PortSettings
{
BaudRateType BaudRate;
DataBitsType DataBits;
ParityType Parity;
StopBitsType StopBits;
FlowType FlowControl;
long Timeout_Millisec;
};
可以看到在这个结构体里定义了串口初始化的各个参数,而对于BaudRateType等类型的定义,我们在这个结构体的上面可以看到,它们是多个枚举变量。如下图。

这时我们便应该明白了,这个结构体便是实现串口参数设置的。
第三,定义串口参数。
BaudRateType BaudRate;
波特率设置,我们设置为9600,即程序中用BAUD9600;
DataBitsType DataBits;
数据位设置,我们设置为8位数据位,即DATA_8;
ParityType Parity;
奇偶校验设置,我们设置为无校验,即PAR_NONE;
StopBitsType StopBits;
停止位设置,我们设置为1位停止位,即STOP_1;
FlowType FlowControl;
数据流控制设置,我们设置为无数据流控制,即FLOW_OFF;
long Timeout_Millisec;
延时设置,我们设置为延时500ms,即500;
这样便写出了程序中的那句:
struct PortSettings myComSetting = {BAUD9600,DATA_8,PAR_NONE,STOP_1,FLOW_OFF,500};
我们定义了一个结构体变量myComSetting,并对其进行了初始化。
第四,设置第三个参数。
我们先按上面的方法找到它的定义位置,在qextserialbase.h中,如下图。

可以看到查询模式也是枚举变量,有两个选项,我们选择第二个EventDriven,事件驱动。
到这里,我们就可以定义Win_QextSerialPort类的变量了,就是那句:
myCom = new Win_QextSerialPort("com1",myComSetting,QextSerialBase::EventDriven);
它完成了串口的选择和串口的初始化。
第五,写打开串口函数和读串口函数。
查看win_qextserialport.h文件,我们会发现Win_QextSerialPort类继承自QextSerialBase类。

查看qextserialbase.h文件,我们会发现QextSerialBase类继承自QIODevice 类。

我们在Qt的帮助中查看QIODevice 类,如下图。

其部分内容如下图。可以看到其中有enum OpenModeFlag { NotOpen, ReadOnly, WriteOnly, ReadWrite, ..., Unbuffered },virtual bool open ( OpenMode mode ),QByteArray readAll ()等内容。

而下面的信号函数中有void readyRead ();它可以查看串口是否有新的数据传来。

所以,我们可以用这个类里的这些函数操作串口。如程序中的语句:
myCom ->open(QIODevice::ReadWrite);
//我们调用了其中的open函数,用ReadWrite可读写的方式进行打开串口;
connect(myCom,SIGNAL(readyRead()),this,SLOT(readMyCom()));
//我们关联信号readyRead(),和自己写的槽函数readMyCom(),当串口有数据传来时进行读串口操作。
void MainWindow::readMyCom() //自己写的读串口函数
{
QByteArray temp = myCom->readAll();
//我们调用readAll()函数,读取串口中所有数据,在上面可以看到其返回值是QByteArray类型。
ui->textBrowser->insertPlainText(temp);
//调用insertPlainText()函数,是窗口上的文本浏览器中连续输出数据,而不是每次写数据前都清除以前的
//数据,可以在Qt的帮助里查看这个函数的说明
}
这样我们便写完了所有的语句,最后只需要在mainwindow.h文件中加入相应的头文件,对象声明,函数声明即可。
这里需要说明的是我们一定要学会查看文件和使用帮助文档,将我们不懂得知识一点一点搞明白。
在下一篇中我们将会加入“打开串口”,“关闭串口”,“发送数据”三个按钮,将整个程序进行完善。
-
Qt编写串口通信程序全程图文讲解(一)(转)
2009-10-22 22:14:03
首先说明我们的编程环境是windows xp下,在Qt Creator中进行,如果在Linux下或直接用源码编写,程序稍有不同,请自己改动。
http://hi.baidu.com/yafeilinux/blog/item/8cf8f89539311a14d31b70a2.html
在Qt中并没有特定的串口控制类,现在大部分人使用的是第三方写的qextserialport类,我们这里也是使用的该类。我们可以去
http://sourceforge.net/projects/qextserialport/files/
进行下载,也可以去下载论坛上的
http://www.qtcn.org/bbs/read.php?tid=22847
下载到的文件为:qextserialport-1.2win-alpha.zip
其内容如下图:

我们在windows下只需要使用其中的6个文件:
qextserialbase.cpp和qextserialbase.h,qextserialport.cpp和qextserialport.h,win_qextserialport.cpp和win_qextserialport.h
如果在Linux下只需将win_qextserialport.cpp和win_qextserialport.h 换为 posix_qextserialport.cpp和posix_qextserialport.h即可。
下面我们将讲述详细编程过程,这里我们先给出完整的程序,然后再进行逐句分析。
1.打开Qt Creator,新建Qt4 Gui Application,工程名设置为mycom,其他使用默认选项。
(注意:建立的工程路径不能有中文。)
2.将上面所说的6个文件复制到工程文件夹下,如下图。

3.在工程中添加这6个文件。
在Qt Creator中左侧的文件列表上,鼠标右击工程文件夹,在弹出的菜单中选择Add Existing Files,添加已存在的文件。如下图:

选择工程文件夹里的那6个文件,进行添加。如下图。

添加好后文件列表如下图所示:

4.点击mainwindow.ui,在窗口上加入一个Text Browser,用来显示信息。如下图。

5.在mainwindow.h的相应位置添加头文件#include "win_qextserialport.h",添加对象声明Win_QextSerialPort *myCom;,添加槽函数声明void readMyCom();,添加完后,如下图。

6.在mainwindow.cpp的类的构造函数中添加如下语句。
MainWindow::MainWindow(QWidget *parent)
: QMainWindow(parent), ui(new Ui::MainWindow)
{
ui->setupUi(this);
struct PortSettings myComSetting = {BAUD9600,DATA_8,PAR_NONE,STOP_1,FLOW_OFF,500};
//定义一个结构体,用来存放串口各个参数
myCom = new Win_QextSerialPort("com1",myComSetting,QextSerialBase::EventDriven);
//定义串口对象,并传递参数,在构造函数里对其进行初始化
myCom ->open(QIODevice::ReadWrite);
//以可读写方式打开串口
connect(myCom,SIGNAL(readyRead()),this,SLOT(readMyCom()));
//信号和槽函数关联,当串口缓冲区有数据时,进行读串口操作
}
在下面添加readMyCom()函数的定义,添加如下代码。
void MainWindow::readMyCom() //读串口函数
{
QByteArray temp = myCom->readAll();
//读取串口缓冲区的所有数据给临时变量temp
ui->textBrowser->insertPlainText(temp);
//将串口的数据显示在窗口的文本浏览器中
}
添加完代码后如下图。
此时如果运行程序,已经能实现读取串口数据的功能了。我们将单片机采集的温度信息由串口传给计算机,效果如下图。

这样最简单的串口通信程序就完成了。可以看到它只需要加入几行代码即可,非常简单。
在下一篇中我们将详细分析添加的每一条语句。
-
QT4安装说明
2009-07-03 15:36:56
Linux下嵌入式Qt4的安装2009-04-26 10:03安装的是Qt4.4.3,注意QT4和QT3的安装有一些不同,用装QT3的方法安装QT4可能会出现一些错误。
QT4的安装粗略过程:
1、从Trolltech公司主页上去下载qt-x11-opensource-src-4.4.3.tar.gz文件包
http://www.qtsoftware.com/downloads
2、解压:gunzip qt-x11-opensource-src-4.4.3.tar.gz;
tar xvf qt-x11-opensource-src-4.4.3.tar.gz;3、运行configure脚本:
进入qt-x11-opensource-src-4.4.3文件夹,
输入./configure,运行shell脚本程序;
4、编译:gmake;
5、安装:gmake install;
(第3、4、5步运行时间比较长,根据机器的配置不同而不同。)
6、设置环境变量:
打开/etc/profile文件,在该文件的末尾加上以下语句:
PATH=/usr/local/Trolltech/Qt-4.4.3/bin:$PATH
QTDIR=/usr/local/Trolltech/Qt-4.4.3
MANPATH=$QTDIR/man:$MANPATH
LD_LIBRARY_PATH=$QTDIR/lib:$LD_LIBRARY_PATH
export PATH QTDIR MANPATH LD_LIBRARY_PATH
保存后重启。
我遇到中文显示乱码的功能,解决办法如下:
运行:/usr/local/Trolltech/Qt-4.4.3/bin/qtconfig,在Font项将字体设置为Bitstream charter
退出保存。
至于最后一步环境变量的设置经试验QT3的方法可以成功,即:
编写/root中的.bash_profile 加入如下几行
QTDIR=/usr/local/qt
PATH=$QTDIR/bin:$PATH
MANPATH=$QTDIR/man:$MANPATH
LD_LIBRARY_PATH=$QTDIR/lib:$LD_LIBRARY_PATHexport QTDIR PATH MANPATH LD_LIBRARY_PATH
QT4的方法未试验
-
关于QT程序在qvfb 和 Xwindows 运行的实例
2009-04-09 20:46:05
qclient.cpp
/*********************************************************************
*******
** $Id: /sample/10/qclient.h2.3.2edited 2004-10-12 $
**
** Copyright (C) 2004-2005 OURSELEC AS. All rights reserved.
** Http://www.ourselec.com
** This file is part of an example program for Qt. This example
** program may be used, distributed and modified without limitation.
**
**********************************************************************
*******/
#include "qclient.h"
#include <qsocket.h>
#include <qapplication.h>
#include <qvbox.h>
#include <qhbox.h>
#include <qtextview.h>
#include <qlineedit.h>
#include <qlabel.h>
#include <qlayout.h>
#include <qpushbutton.h>
#include <qtextstream.h>
#include <qpoint.h>
QClient::QClient(QWidget *parent, const char *name)
: QWidget(parent, name)
{
infoText = new QTextView(this);
QHBox *hb = new QHBox(this);
inputText = new QLineEdit(hb);
QHBox *addrBox = new QHBox(this);
QLabel *ip= new QLabel("IP:", addrBox, "ip");
ip->setAlignment(1);
addrText= new QLineEdit(addrBox);
QLabel *port = new QLabel("PORT:", addrBox, "port");
port->setAlignment(1);
portText= new QLineEdit(addrBox);
QHBox *buttonBox = new QHBox(this);
QPushButton *send= new QPushButton(tr("Send"), hb);
QPushButton *close = new QPushButton(tr("Close connection"),
buttonBox);
QPushButton *quit= new QPushButton(tr("Quit"), buttonBox);
QPushButton *Connect = new QPushButton(tr("Connect"),
addrBox);
connect(send, SIGNAL(clicked()),
SLOT(sendToServer()) );
connect(close, SIGNAL(clicked()),
SLOT(closeConnection()) );
connect(quit, SIGNAL(clicked()),
qApp, SLOT(quit()) );
connect(Connect, SIGNAL(clicked()),
SLOT(connectToServer()) );
socket = new QSocket(this);
connect(socket, SIGNAL(connected()),
SLOT(socketConnected()) );
connect(socket, SIGNAL(connectionClosed()),
SLOT(socketConnectionClosed()) );
connect(socket, SIGNAL(readyRead()),
SLOT(socketReadyRead()) );
connect(socket, SIGNAL(error(int)),
SLOT(socketError(int)) );
QVBoxLayout *l = new QVBoxLayout(this);
l->addWidget(infoText, 10);
l->addWidget(hb, 1);
l->addWidget(addrBox, 1);
l->addWidget(buttonBox, 1);
//connect to the server
infoText->append(tr("Tying to connect to the server"));
}void QClient::closeConnection()
{
socket->close();
if (QSocket::Closing == socket->state()) {
// We have a delayed close
connect(socket, SIGNAL(delayedCloseFinished()),
SLOT(socketClosed()));
} else {
// The socket is closed
socketClosed();
}
}void QClient::sendToServer()
{
// write to the server
if (QSocket::Connection == socket->state()) {
QTextStream os(socket);
os << inputText->text() << "\n";
inputText->setText("");
} else {
// The socket is unconnected
infoText->append(tr("The server is lost\n"));
}
}void QClient::connectToServer()
{
// connect to the server
socket->connectToHost(addrText->text(), (portText->text()).toInt());
}void QClient::socketReadyRead()
{
// read from the server
while (socket->canReadLine()) {
infoText->append(socket->readLine());
}
}void QClient::socketConnected()
{
infoText->append(tr("Connected to server\n"));
}void QClient::socketConnectionClosed()
{
infoText->append(tr("Connection closed by the server\n"));
}void QClient::socketClosed()
{
infoText->append(tr("Connection closed\n"));
}void QClient::socketError(int e)
{
if (e == QSocket::ErrConnectionRefused) {
infoText->append(tr("Connection Refused\n"));
} else if (e == QSocket::ErrHostNotFound) {
infoText->append(tr("Host Not Found\n"));
} else if (e == QSocket::ErrSocketRead) {
infoText->append(tr("Socket Read Error\n"));
}
}qclient.h
/**************************************************************
**************
** $Id: /sample/10/qclient.h2.3.2edited 2004-10-12 $
**
** Copyright (C) 2004-2005 OURSELEC AS. All rights reserved.
** Http://www.ourselec.com
** This file is part of an example program for Qt. This example
** program may be used, distributed and modified without limitation.
**
**********************************************************************
*******/
#ifndef QCLIENT_H
#define QCLIENT_H#include <qsocket.h>
#include <qapplication.h>
#include <qvbox.h>
#include <qhbox.h>
#include <qtextview.h>
#include <qlineedit.h>
#include <qlabel.h>
#include <qpushbutton.h>
#include <qtextstream.h>
class QClient : public QWidget
{
Q_OBJECT
public:
QClient(QWidget *parent = 0, const char *name = 0);
private slots:
void closeConnection(); //关闭网络连接
void sendToServer(); //发送数据到服务器端
void connectToServer();
void socketReadyRead();
void socketConnected();
void socketConnectionClosed();
void socketClosed();
void socketError(int);
private:
QSocket *socket;
QTextView *infoText;
QLineEdit *addrText;
QLineEdit *portText;
QLineEdit *inputText;
};
#endif
//QCLIENT_Hmain.cpp
/*********************************************************************
*******
** $Id: /sample/10/main.cpp2.3.2edited 2004-10-12 $
**
** Copyright (C) 2004-2005 OURSELEC AS. All rights reserved.
** Http://www.ourselec.com
** This file is part of an example program for Qt. This example
** program may be used, distributed and modified without limitation.
**
**********************************************************************
*******/#include <qapplication.h>
#include "qclient.h"
int main( int argc, char **argv )
{
QApplication app( argc, argv );
QClient *client = new QClient( 0 );
app.setMainWidget( client );
client->show();
int result = app.exec();
return result;
}server.cpp
/*********************************************************************
*******
** $Id: qt/server.cpp 3.0.5edited Oct 12 2001 $
**
** Copyright (C) 1992-2000 Trolltech AS. All rights reserved.
**
** This file is part of an example program for Qt. This example
** program may be used, distributed and modified without limitation.
**
**********************************************************************
*******/#include <qsocket.h>
#include <qserversocket.h>
#include <qapplication.h>
#include <qvbox.h>
#include <qtextview.h>
#include <qlabel.h>
#include <qpushbutton.h>
#include <qtextstream.h>#include <stdlib.h>
/*The ClientSocket class provides a socket that is connected with a client.
For every client that connects to the server, the server creates a new
instance of this class.
*/
class ClientSocket : public QSocket
{
Q_OBJECT
public:
ClientSocket( int sock, QObject *parent=0, const char *name=0 ) :
QSocket( parent, name )
{
line = 0;
connect( this, SIGNAL(readyRead()), SLOT(readClient()) );
connect( this, SIGNAL(connectionClosed()),
SLOT(connectionClosed()) );
setSocket( sock );
}
~ClientSocket()
{
}
private slots:
void readClient()
{
while ( canReadLine() ) {
QTextStream os( this );
os << line << ": " << readLine();
line++;
}
}
void connectionClosed()
{
delete this;
}
private:
int line;
};
/*
The SimpleServer class handles new connections to the server. For every
client that connects, it creates a new ClientSocket -- that instance is now
responsible for the communication with that client.
*/class SimpleServer : public QServerSocket
{
Q_OBJECT
public:
SimpleServer( QObject* parent=0 ) :
QServerSocket( 4242, 1, parent )
{
if ( !ok() ) {
qWarning("Failed to bind to port 4242");
exit(1);
}
}
~SimpleServer()
{
}
void newConnection( int socket )
{
(void)new ClientSocket( socket, this );
emit newConnect();
}
signals:
void newConnect();
};
/*
The ServerInfo class provides a small GUI for the server. It also creates the
SimpleServer and as a result the server.
*/
class ServerInfo : public QVBox
{
Q_OBJECT
public:
ServerInfo()
{
SimpleServer *server = new SimpleServer( this );
QString itext = QString("This is a small server example.\n"
"Connect with the client now."
);
QLabel *lb = new QLabel( itext, this );
lb->setAlignment( AlignHCenter );
infoText = new QTextView( this );
QPushButton *quit = new QPushButton( "Quit" , this );
connect( server, SIGNAL(newConnect()),
SLOT(newConnect()) );
connect( quit, SIGNAL(clicked()), qApp, SLOT(quit()) );
}
~ServerInfo()
{
}
private slots:
void newConnect()
{
infoText->append( "New connection\n" );
}
private:
QTextView *infoText;
};int main( int argc, char** argv )
{
QApplication app( argc, argv );
ServerInfo info;
app.setMainWidget( &info );
info.show();
return app.exec();
}
#include "server.moc"其中,qclient.h qclient .cpp main.cpp 是客户端程序 server.cpp 是服务端程序
服务器端和客户端的程序单独编译后,一个在 Qvfb 上运行,
一个在 X 上运行,结果如图所示:
-
关于QT程序在qvfb 和 Xwindows 运行的一点理解
2009-04-09 20:19:29
关于QT程序在qvfb 和 Xwindows 运行的一点理解
关于QT 的环境安装见《 安装与建立QT/E桌面的运行环境》 一文。
要使QT程序在不同的平台运行,就得重新编译源程序, 它是一次编写,处处编译的,
要在qvfb 上运行用下面的环境变量配置:
export QTDIR=/s3c2410_linux/QT/qt-2.3.7
export TMAKE=/s3c2410_linux/QT/tmake
export TMAKEPATH=$TMAKE/lib/qws/linux-x86-g++
export PATH=$PATH:$TMAKE/bin
export LD_LIBRARY_PATH=$QTDIR/lib:$LD_LIBRARY_PATH要在Xwindows 上运行用下面的环境变量配置:
#bash set environment for QTX11
export QTDIR=$PWD/qt-x11-2.3.2
export PATH=$QTDIR/bin:$PATH
export LD_LIBRARY_PATH=$QTDIR/lib:$LD_LIBRARY_PATH
export TMAKEPATH=$PWD/tmake/lib/linux-g++
export PATH=$TMAKEPATH:$PATH注 意除了在QTDIR和LD_LIBRARY_PATH的不同,还有TMAKEPATH的不同,因为一般嵌入式设备上都是在framebuffer的方式,在X11上就是用qvfb 来模拟framebuffer的。
要用framebuffer立式运程序就要用tmake\lib\qws\下的对应的编译器,这里是linux-x86平台,所以用linux-x86-g++。惹不是framebuffer就要用\tmake\lib\下的,这里是linux-g++。
tmake\lib\qws\linux-x86-g++\tmake.conf
# $Id: tmake.conf,v 1.1 1999/11/08 03:06:27 warwick Exp $
#
# tmake configuration for linux-g++
#TEMPLATE = app
CONFIG = qt warn_on releaseTMAKE_CC = gcc
TMAKE_CFLAGS = -pipe
TMAKE_CFLAGS_WARN_ON = -Wall -W
TMAKE_CFLAGS_WARN_OFF =
TMAKE_CFLAGS_RELEASE = -O2 -fno-default-inline
TMAKE_CFLAGS_DEBUG = -g
TMAKE_CFLAGS_SHLIB = -fPIC
TMAKE_CFLAGS_YACC = -Wno-unused -Wno-parentheses
TMAKE_CFLAGS_THREAD = -D_REENTRANTTMAKE_CXX = g++
TMAKE_CXXFLAGS = $$TMAKE_CFLAGS -DQWS -fno-exceptions -fno-rtti
TMAKE_CXXFLAGS_WARN_ON = $$TMAKE_CFLAGS_WARN_ON
TMAKE_CXXFLAGS_WARN_OFF = $$TMAKE_CFLAGS_WARN_OFF
TMAKE_CXXFLAGS_RELEASE = $$TMAKE_CFLAGS_RELEASE
TMAKE_CXXFLAGS_DEBUG = $$TMAKE_CFLAGS_DEBUG
TMAKE_CXXFLAGS_SHLIB = $$TMAKE_CFLAGS_SHLIB
TMAKE_CXXFLAGS_YACC = $$TMAKE_CFLAGS_YACC
TMAKE_CXXFLAGS_THREAD = -D_REENTRANTTMAKE_INCDIR =
TMAKE_LIBDIR =
TMAKE_INCDIR_X11 =
TMAKE_LIBDIR_X11 =
TMAKE_INCDIR_QT = $(QTDIR)/include
TMAKE_LIBDIR_QT = $(QTDIR)/lib
TMAKE_INCDIR_OPENGL = /usr/X11R6/include
TMAKE_LIBDIR_OPENGL = /usr/X11R6/libTMAKE_LINK = g++
TMAKE_LINK_SHLIB = g++
TMAKE_LFLAGS =
TMAKE_LFLAGS_RELEASE =
TMAKE_LFLAGS_DEBUG =
TMAKE_LFLAGS_SHLIB = -shared
TMAKE_LFLAGS_SONAME = -Wl,-soname,
TMAKE_LFLAGS_THREAD =
TMAKE_RPATH = -Wl,-rpath,TMAKE_LIBS =
TMAKE_LIBS_X11 =
TMAKE_LIBS_X11SM =
TMAKE_LIBS_QT = -lqte
TMAKE_LIBS_QT_THREAD = -lqte-mt
TMAKE_LIBS_OPENGL =
TMAKE_LIBS_THREAD = -lpthreadTMAKE_MOC = $(QTDIR)/bin/moc
TMAKE_UIC = $(QTDIR)/bin/uicTMAKE_AR = ar cqs
TMAKE_RANLIB =TMAKE_TAR = tar -cf
TMAKE_GZIP = gzip -9ftmake\lib\linux-g++\tmake.conf
#
# $Id: tmake.conf,v 1.15 1999/07/28 15:21:49 hanord Exp $
#
# tmake configuration for linux-g++
#TEMPLATE = app
CONFIG = qt warn_on releaseTMAKE_CC = gcc
TMAKE_CFLAGS = -pipe
TMAKE_CFLAGS_WARN_ON = -Wall -W
TMAKE_CFLAGS_WARN_OFF =
TMAKE_CFLAGS_RELEASE = -O2
TMAKE_CFLAGS_DEBUG = -g
TMAKE_CFLAGS_SHLIB = -fPIC
TMAKE_CFLAGS_YACC = -Wno-unused -Wno-parenthesesTMAKE_CXX = g++
TMAKE_CXXFLAGS = $$TMAKE_CFLAGS
TMAKE_CXXFLAGS_WARN_ON = $$TMAKE_CFLAGS_WARN_ON
TMAKE_CXXFLAGS_WARN_OFF = $$TMAKE_CFLAGS_WARN_OFF
TMAKE_CXXFLAGS_RELEASE = $$TMAKE_CFLAGS_RELEASE
TMAKE_CXXFLAGS_DEBUG = $$TMAKE_CFLAGS_DEBUG
TMAKE_CXXFLAGS_SHLIB = $$TMAKE_CFLAGS_SHLIB
TMAKE_CXXFLAGS_YACC = $$TMAKE_CFLAGS_YACCTMAKE_INCDIR =
TMAKE_LIBDIR =
TMAKE_INCDIR_X11 = /usr/X11R6/include
TMAKE_LIBDIR_X11 = /usr/X11R6/lib
TMAKE_INCDIR_QT = $(QTDIR)/include
TMAKE_LIBDIR_QT = $(QTDIR)/lib
TMAKE_INCDIR_OPENGL = /usr/X11R6/include
TMAKE_LIBDIR_OPENGL = /usr/X11R6/libTMAKE_LINK = g++
TMAKE_LINK_SHLIB = g++
TMAKE_LFLAGS =
TMAKE_LFLAGS_RELEASE =
TMAKE_LFLAGS_DEBUG =
TMAKE_LFLAGS_SHLIB = -shared
TMAKE_LFLAGS_SONAME = -Wl,-soname,TMAKE_LIBS =
TMAKE_LIBS_X11 = -lXext -lX11 -lm
TMAKE_LIBS_X11SM = -lICE -lSM
TMAKE_LIBS_QT = -lqt
TMAKE_LIBS_QT_OPENGL = -lqgl
TMAKE_LIBS_OPENGL = -lMesaGL -lMesaGLU -lXmuTMAKE_MOC = moc
TMAKE_AR = ar cqs
TMAKE_RANLIB =TMAKE_TAR = tar -cf
TMAKE_GZIP = gzip -9f看了一下致有这些不同
TMAKE_CFLAGS_RELEASE = -O2 -fno-default-inline qwsTMAKE_CFLAGS_RELEASE = -O2
TMAKE_CXXFLAGS = $$TMAKE_CFLAGS -DQWS -fno-exceptions -fno-rtti qwsTMAKE_CXXFLAGS = $$TMAKE_CFLAGS
TMAKE_CXXFLAGS_THREAD = -D_REENTRANT qws
TMAKE_INCDIR_X11 = /usr/X11R6/include
TMAKE_LIBDIR_X11 = /usr/X11R6/lib
TMAKE_RPATH = -Wl,-rpath, qws下面看看*.pro 有什么不同。
server/server.pro (qvfb :$TMAKE/lib/qws/linux-x86-g++)
TEMPLATE = app
CONFIG = qt warn_on release
HEADERS =
SOURCES = server.cpp
TARGET = server
server/server.pro (Xwindows :tmake/lib/linux-g++)
TEMPLATE = app
CONFIG = qt warn_on release
HEADERS =
SOURCES = server.cpp
TARGET = server
它们的工程文件是一样的。下面看看Makefile有什么不同。
server/Makefile (qvfb :$TMAKE/lib/qws/linux-x86-g++)
#############################################################################
# Makefile for building server
# Generated by tmake at 14:44, 2008/07/15
# Project: server
# Template: app
#################################################################################### Compiler, tools and options
CC = gcc
CXX = g++
CFLAGS = -pipe -Wall -W -O2 -fno-default-inline -DNO_DEBUG
CXXFLAGS= -pipe -DQWS -fno-exceptions -fno-rtti -Wall -W -O2 -fno-default-inline -DNO_DEBUG
INCPATH = -I$(QTDIR)/include
LINK = g++
LFLAGS =
LIBS = -L$(QTDIR)/lib -lqte
MOC = $(QTDIR)/bin/mocTAR = tar -cf
GZIP = gzip -9f####### Files
HEADERS =
SOURCES = server.cpp
OBJECTS = server.o
SRCMOC = server.moc
OBJMOC =
DIST =
TARGET = server####### Implicit rules
.SUFFIXES: .cpp .cxx .cc .C .c
.cpp.o:
$(CXX) -c $(CXXFLAGS) $(INCPATH) -o $@ $<.cxx.o:
$(CXX) -c $(CXXFLAGS) $(INCPATH) -o $@ $<.cc.o:
$(CXX) -c $(CXXFLAGS) $(INCPATH) -o $@ $<.C.o:
$(CXX) -c $(CXXFLAGS) $(INCPATH) -o $@ $<.c.o:
$(CC) -c $(CFLAGS) $(INCPATH) -o $@ $<####### Build rules
all: $(TARGET)
$(TARGET): $(OBJECTS) $(OBJMOC)
$(LINK) $(LFLAGS) -o $(TARGET) $(OBJECTS) $(OBJMOC) $(LIBS)moc: $(SRCMOC)
tmake: Makefile
Makefile: server.pro
tmake server.pro -o Makefiledist:
$(TAR) server.tar server.pro $(SOURCES) $(HEADERS) $(DIST)
$(GZIP) server.tarclean:
-rm -f $(OBJECTS) $(OBJMOC) $(SRCMOC) $(TARGET)
-rm -f *~ core####### Compile
server.o: server.cpp \
server.mocserver.moc: server.cpp
$(MOC) server.cpp -o server.mocserver/Makefiel (Xwindows :tmake/lib/linux-g++)
#############################################################################
# Makefile for building server
# Generated by tmake at 10:47, 2008/07/15
# Project: server
# Template: app
#################################################################################### Compiler, tools and options
CC = gcc
CXX = g++
CFLAGS = -pipe -Wall -W -O2 -DNO_DEBUG
CXXFLAGS= -pipe -Wall -W -O2 -DNO_DEBUG
INCPATH = -I$(QTDIR)/include
LINK = g++
LFLAGS =
LIBS = -L$(QTDIR)/lib -lqt -L/usr/X11R6/lib -lXext -lX11 -lm
MOC = mocTAR = tar -cf
GZIP = gzip -9f####### Files
HEADERS =
SOURCES = server.cpp
OBJECTS = server.o
SRCMOC = server.moc
OBJMOC =
DIST =
TARGET = server####### Implicit rules
.SUFFIXES: .cpp .cxx .cc .C .c
.cpp.o:
$(CXX) -c $(CXXFLAGS) $(INCPATH) -o $@ $<.cxx.o:
$(CXX) -c $(CXXFLAGS) $(INCPATH) -o $@ $<.cc.o:
$(CXX) -c $(CXXFLAGS) $(INCPATH) -o $@ $<.C.o:
$(CXX) -c $(CXXFLAGS) $(INCPATH) -o $@ $<.c.o:
$(CC) -c $(CFLAGS) $(INCPATH) -o $@ $<####### Build rules
all: $(TARGET)
$(TARGET): $(OBJECTS) $(OBJMOC)
$(LINK) $(LFLAGS) -o $(TARGET) $(OBJECTS) $(OBJMOC) $(LIBS)moc: $(SRCMOC)
tmake: Makefile
Makefile: server.pro
tmake server.pro -o Makefiledist:
$(TAR) server.tar server.pro $(SOURCES) $(HEADERS) $(DIST)
$(GZIP) server.tarclean:
-rm -f $(OBJECTS) $(OBJMOC) $(SRCMOC) $(TARGET)
-rm -f *~ core####### Compile
server.o: server.cpp \
server.mocserver.moc: server.cpp
$(MOC) server.cpp -o server.moc下面几项Makefile有所不同。
server/Makefile (qvfb :$TMAKE/lib/qws/linux-x86-g++)
CFLAGS = -pipe -Wall -W -O2 -fno-default-inline -DNO_DEBUG
CXXFLAGS= -pipe -DQWS -fno-exceptions -fno-rtti -Wall -W -O2 -fno-default-inline -DNO_DEBUG
LIBS = -L$(QTDIR)/lib -lqte
MOC = $(QTDIR)/bin/mocserver/Makefiel (Xwindows :tmake/lib/linux-g++)
CFLAGS = -pipe -Wall -W -O2 -DNO_DEBUG
CXXFLAGS= -pipe -Wall -W -O2 -DNO_DEBUGLIBS = -L$(QTDIR)/lib -lqt -L/usr/X11R6/lib -lXext -lX11 -lm
MOC = moc红色比较主要。
-
在Linux中用虚拟机添加应用程序HELLO
2009-03-26 14:27:32
1.保存下面文件hello.desktop 在QPEDIR/apps/applications
[Desktop Entry]
Comment=A Simply Application Program
Exec=hello
Icon=TodayApp
Type=Application
Name=Hello World2.把写好的应用程序hello.放在 QPEDIR/bin下面
在运行qvfb&
qpe后,将会看到自己刚写好的 hello程序在PDA中有显示.
-
在开发板上测试hello程序出错及解答过程
2009-01-08 16:46:44
./hello
error:
/hello: error while loading shared libraries: libqte.so.2: cannot open shared o
bject file: No such file or directory
try to run sister hello here
# /tmp/hello
error:
Cannot find font definition file /home/qte/qt-embedded-free-3.3.4/lib/fonts/font
dir - is Qt installed correctly?
but there is truly no direcotory named /home/qte/.... on arm now, strange!
then i
#mount mp3 on /peter
then
i export LD_LIBRARY_PATH=/path/to/my/lib
then
#./hello
still same error:lib not found.
then i
usr/qt/lib # mv libqte.so.2* /peter/mhel/ql/
error:
mv: cannot create symlink `/peter/mhel/ql/libqte.so.2': Operation not permitted
mv: cannot create symlink `/peter/mhel/ql/libqte.so.2.3': Operation not permitte
d
mv: unable to preserve ownership of `/peter/mhel/ql/libqte.so.2.3.1': Operation
not permitted
so finally the sis lib itself is on mp3, but the two symbol links
are still there on arm
the lib's name become capitalized when i open it again in windows.
that means i can not copy it back to arm directly now!!!
that is bad, since linux is case sensitive.
ok anyway,now reboot
the sis-hello runs as before, so i know the /usr/qt/lib is not in use.
it is the /lib/libqte that matters.
so now
*************************
/ # ./hello
./hello: error while loading shared libraries: libqte.so.2: cannot open shared o
bject file: No such file or directory
#cd lib
#ln -s libqte.so.3 libqte.so.2
#cd /
# ./hello
./hello: error while loading shared libraries: libstdc++.so.5: cannot open share
d object file: No such file or directory
# cd lib/
/lib # ln -s libstdc++.so.6 libstdc++.so.5
#cd /
# ./hello
./hello: /lib/libstdc++.so.5: version `GLIBCPP_3.2' not found (required by ./hel
lo)
later, i find libstdc++.so.5 is in /usr/local/arm/3.3.2/lib
people on net say libstdc++.so.5 and .6 are incompatiable, that's bad.
**
lib # ln -s libstdc\+\+-3-libc6.1-2-2.10.0.so libstdc++.so.5
peter: i make a symbol linux to a symbol link before, and it does not work,
this time i think i am right,
because error message is different, and part of it is what shows up when i
try to run sis_hello
/hello: /lib/libstdc++.so.5: no version information available (required by /hell
o)
Cannot find font definition file /home/qte/qt-embedded-free-3.3.4/lib/fonts/font
dir - is Qt installed correctly?
**reboot arm
# ./hello
./hello: /lib/libstdc++.so.5: no version information available (required by ./he
llo)
QSocket::writeBlock: Socket is not open
QSocket::writeBlock: Socket is not open
QSocket::writeBlock: Socket is not open
No Qt/Embedded server appears to be running.
If you want to run this program as a server,
add the "-qws" command-line option.
peter: from all above, i believe libqte.so.3 and .2 is compatiable. but the libstdc++6
refuse to corperate.
********
when i copy the right libstdc++
from /usr/local/arm/3.3.2/arm-linux/lib
and make the needed symbol link to it
then
#./hello
the "no version information available" error disappers
but the "Qsocket error" remains, reboot, nothing shows up on the screen.
now may be the fake lqte.so is responsible!
*******************
now i will use a fake libstdC++, and a right lqte, wait and see
/lib # ln -s libqte~1.7 libqte.so.2
/lib # cd ..
/ # ./hello
./hello: /lib/libstdc++.so.5: no version information available (required by ./he
llo)
./hello: relocation error: /lib/libqte.so.2: undefined symbol: __cxa_pure_virtua
l
peter: it is obvious that the lqte is right now. something wrong is with libstdc++.
and one interesting phenomenon can be seen that even the empty screen do not shows up.
i think i can understand, it is because qte needs the libc++, now that my hello invokes
the fake c++ lib, so the qte fails to run.
*********************************
since there is not enough space on arm,
i need to move libqte.so.3 or libstdc++.so.6 out of arm.
once that are moved onto mp3, the name will be changed(caoitalized),
can i move it back?
now i
#mv /lib/libqte.so.3.3.4 /peter
peter/ is mp3
then, reboot, no blue screen can be seen.
now i will change the name of libqte back,and copy it back
it is done. you just need to be very careful about the name.
copy the lib to mp3 will not ruin it. that's good.
*******************
so finally when there is
/lib/libstdc++.so.5(plus its symbol link)
/lib/libqte.so.2(symbol link is also needed)
my hello runs on arm perfectly. -
aclock.cpp:83: no matching function for call to `QPainter::setWindow(int, int,
2009-01-07 20:07:34
我编译aclock时,出现问题如下:[root@localhost aclock]# make
g++ -c -pipe -DQWS -fno-exceptions -fno-rtti -Wall -W -O2 -DNO_DEBUG -I/friendly-arm/x86-qtopia/qt/include -o aclock.o aclock.cpp
aclock.cpp: In member function `void AnalogClock::drawClock(QPainter*)':
aclock.cpp:83: no matching function for call to `QPainter::setWindow(int, int,
int, int)'
aclock.cpp:85: no matching function for call to `QPainter::viewport()'
aclock.cpp:88: no matching function for call to `QPainter::setViewport(int,
int, int&, int&)'
aclock.cpp:94: no matching function for call to `QPainter::rotate(int)'
aclock.cpp:100: no matching function for call to `QPainter::rotate(int)'
aclock.cpp:107: no matching function for call to `QPainter::rotate(in解决办法
参见 qpainter.h (qt-embedded-2.3.7\include)
setWindow函数的声明是用#ifndef QT_NO_TRANSFORMATIONS括起来的, 说明你的config里定义了这个宏, 所以这些函数都没编进你的qte注释这个宏即可.
-
QT中hello程序make出错
2009-01-07 20:06:26
[root@jude jude_qt]# make
Makefile:119: warning: overriding commands for target `moc_hello.cpp'
Makefile:116: warning: ignoring old commands for target `moc_hello.cpp'
gcc -o hello hello.o main.o hello.o moc_hello.o moc_hello.o -L/usr/x-qtopia/qt-2.3.7/lib -lm -lqte
hello.o(.text+0x0): In function `Hello::Hello[not-in-charge](QWidget*, char const*, unsigned)':
: multiple definition of `Hello::Hello[not-in-charge](QWidget*, char const*, unsigned)'
hello.o(.text+0x0): first defined here
hello.o(.text+0x190): In function `Hello::Hello[in-charge](QWidget*, char const*, unsigned)':
: multiple definition of `Hello::Hello[in-charge](QWidget*, char const*, unsigned)'
hello.o(.text+0x190): first defined here
hello.o(.text+0x320): In function `Hello::~Hello [not-in-charge]()':
: multiple definition of `Hello::~Hello [not-in-charge]()'
hello.o(.text+0x320): first defined here
hello.o(.text+0x344): In function `Hello::~Hello [in-charge]()':
: multiple definition of `Hello::~Hello [in-charge]()'
hello.o(.text+0x344): first defined here
hello.o(.text+0x368): In function `Hello::~Hello [in-charge deleting]()':
: multiple definition of `Hello::~Hello [in-charge deleting]()'
hello.o(.text+0x368): first defined here
moc_hello.o(.text+0xcc): In function `Hello::staticMetaObject()':
: multiple definition of `Hello::staticMetaObject()'
moc_hello.o(.text+0xcc): first defined here
moc_hello.o(.text+0x0): In function `Hello::className() const':
: multiple definition of `Hello::className() const'
moc_hello.o(.text+0x0): first defined here
moc_hello.o(.data+0x0): multiple definition of `Hello::metaObj'
moc_hello.o(.data+0x0): first defined here
moc_hello.o(.text+0xc): In function `Hello::initMetaObject()':
: multiple definition of `Hello::initMetaObject()'
moc_hello.o(.text+0xc): first defined here
moc_hello.o(.text+0x74): In function `Hello::tr(char const*)':
: multiple definition of `Hello::tr(char const*)'
moc_hello.o(.text+0x74): first defined here
moc_hello.o(.text+0xa0): In function `Hello::tr(char const*, char const*)':
: multiple definition of `Hello::tr(char const*, char const*)'
moc_hello.o(.text+0xa0): first defined here
/usr/x-qtopia/qt-2.3.7/lib/libqte.so: undefined reference to `QWizard::staticMetaObject()'
collect2: ld returned 1 exit status
make: *** [hello] Error 1解决方法:
.pro文件中的qt改为qtopia
-
用QT测试一个hello程序
2009-01-07 20:03:00
在Qt中编程,利用Signal和Slot进行对象之间的通信是Qt的主要特征。它与Windows中的消息机制非常类似,但是Signal和Slot机制真正实现了一种消息的封装。当对象的状态改变时,发出Signal,通知所有的Slot接受Signal,尽管它不知道哪些函数是Slot,Slot一开始也不知道哪些Signal可以接收。Signal和Slot之间不是一一对应的关系,一个Signal可以发给多个Slot, Slot也可以接收多个Signal。Slot除了可以接收Signal以外,与其它的成员函数没有区别。这种机制比使用回调函数要灵活,但是会减慢程序的运行速度。不过在现在高速CPU的面前,这种损失是无足轻重的,而且它还能保证程序的简明性和灵活性,非常便利。
在Qt的组件中,不仅定义了常用的成员变量和成员函数,还定义了所有与该组件相关的Signal和Slot。
要将组件组合起来,最简单的方法就是使用Qt Designer。首先要启动Qt Designer,在Linux命令模式下,键入以下命令(假设Qt安装在/usr/local下):
cd qt-2.3.2/bin ./designer
这样就可以启动一个与Windows下的Delphi相类似的如图1的界面。

图1 Qt Designer界面
然后新建一个QFrame,将自己需要的组件直接拖拉到这个Frame中,相信很多人都有过这样的经历,此处就不再详细描述了。完成之后存盘时,会将这个新的组件保存为一个扩展名为.ui的文件。假设所存的文件名为test.ui,用vi test.ui来查看这个文件,发现这是一个用xml语言写的一个文本。下面用这个test.ui生成相应的test.h和test.cpp。同样还是在这个目录下,可以看到一个uic的工具,这个是Qt专门用来将ui文件生成.h和.cpp文件的,在终端模式下键入以下命令:
progen -n hello -o hello.pro
./uic -o test.h test.ui ./uic -o test.cpp -impl hello.h test.ui
vi main.cpp 然后加些自己需要的代码
progen -n hello -o hello.pro
tmake -o Makefile hello.pro 生成Makefile文件
make 生成需要的可执行文件
然后 qvrb&
./hello -qws
即可观察到程序执行结果
此时就能看到生成了相应test.h和test.cpp,这是一个类。当然这只是一些表面的东西,还需要在这些代码中添加相应的Signal和Slot,完成所需要的操作。值得注意的是,相应版本生成的ui最好用相应版本的uic来生成代码。
-
错误:/bin/sh: line 1: arm-linux-g++: command not found
2009-01-07 20:01:40
./configure -xplatform linux-arm-g++ -qconfig qpe
编译的出错情况是这样:
echo '#include "kernel/qt.h"' >allmoc.cpp
arm-linux-g++ -E -DQT_MOC_CPP -I/usr/jin/qteqpe/qt-2.3.7/include -pipe -DQWS -fno-exceptions -fno-rtti -O2 -Wall -W -DNO_DEBUG -fPIC -DQT_NO_IMAGEIO_MNG -DQT_NO_QWS_VOODOO3 -DQT_NO_QWS_MACH64 -DQT_NO_QWS_MATROX -DQT_NO_QWS_VNC -DQT_NO_QWS_VGA_16 -DQT_NO_QWS_DEPTH_4 -DQT_NO_QWS_DEPTH_8 -DQT_NO_QWS_DEPTH_24 -DQT_NO_QWS_DEPTH_32 -DQT_BUILTIN_GIF_READER=0 -DQT_NO_IMAGEIO_JPEG -DQT_NO_IMAGEIO_MNG -DQT_NO_SM_SUPPORT -I/usr/jin/qteqpe/qt-2.3.7/src/3rdparty/zlib -I/usr/jin/qteqpe/qt-2.3.7/src/3rdparty/libpng -I3rdparty/kernel -I3rdparty/tools >allmoc.h allmoc.cpp
/bin/sh: line 1: arm-linux-g++: command not found
make[1]: *** [allmoc.cpp] Error 127
make[1]: Leaving directory `/usr/jin/qteqpe/qt-2.3.7/src'
make: *** [sub-src] Error 2
[root@localhost qt-2.3.7]#解决方法:
SYSCONF_LINK = arm-linux-gcc
SYSCONF_LINK_SHLIB = arm-linux-gcc
均改为
SYSCONF_LINK = arm-linux-g++
SYSCONF_LINK_SHLIB = arm-linux-g++ -
错误:kernel/qt_x11.h:65:22: X11/Xlib.h: 没有那个文件或目录
2009-01-07 20:00:12
[root@localhost host]#cd qt-x11
[root@localhost qt-x11]#export QTDIR=$PWD
[root@localhost qt-x11]#echo yes|./configure -static -no-xft -no-opengl -no-sm
[root@localhost qt-x11]# make -C src/moc
[root@localhost qt-x11]# cp src/moc/moc bin/
[root@localhost qt-x11]# make -C src
注:此处可能会提示错误信息,那是由于你的系统没有安装X窗口系统环境有问题,错误提示信息如下所示:
kernel/qt_x11.h:65:22: X11/Xlib.h: 没有那个文件或目录
kernel/qt_x11.h:71:23: X11/Xutil.h: 没有那个文件或目录
kernel/qt_x11.h:72:21: X11/Xos.h: 没有那个文件或目录
kernel/qt_x11.h:73:23: X11/Xatom.h: 没有那个文件或目录
kernel/qt_x11.h:84:34: X11/extensions/shape.h: 没有那个文件或目录
kernel/qpsprinter.cpp: In member function `USHORT
QPSPrinterFontTTF::unicode_for_glyph(int)':
kernel/qpsprinter.cpp:3328: warning: `ULONG offset' might be used uninitialized
in this function
kernel/qpsprinter.cpp: In constructor `QPSPrinterFont::QPSPrinterFont(const
QFont&, QPSPrinterPrivate*)':
kernel/qpsprinter.cpp:5195: `XGetFontPath' undeclared (first use this function)
kernel/qpsprinter.cpp:5195: (Each undeclared identifier is reported only once
for each function it appears in.)
kernel/qpsprinter.cpp:5235: `XFreeFontPath' undeclared (first use this
function)
make: *** [kernel/qpsprinter.o] Error 1
解决方法:利用“添加/删除程序”给系统安装X软件开发包
-
错误: undefined reference to `operator new(unsigned)'
2009-01-07 19:59:04
: undefined reference to `operator new(unsigned)'
/usr/local/arm/qt_x86/qt/lib/libqte.so: undefined reference to `operator new[](unsigned)'
/usr/local/arm/qt_x86/qt/lib/libqte.so: undefined reference to `__cxa_pure_virtual'
/usr/local/arm/qt_x86/qt/lib/libqte.so: undefined reference to `operator delete[](void*)'
collect2: ld returned 1 exit status
make: *** [hello] Error 1【原因】:
原因是Makefile 里的LINK 项应该为g++ 而不是gcc , 修改
tmake/lib/qws/linux-generic-g++/tmake.conf
#vi $TMAKEPATH/tmake.conf
将TMAKE_LINK = gcc 和TMAKE_LINK_SHLIB = gcc
分别修改成
TMAKE_LINK = g++和TMAKE_LINK_SHLIB = g++
#tmake –o Makefile hello.pro
此时查看Makefile 里的LINK 项应该已经为g++ -
错误: freetype/freetype.h: 没有那个文件或目录
2009-01-07 19:56:21
tar xfz qt-x11-2.3.2.tar.gz
cd qt-2.3.2
export QTDIR=$PWD
export PATH=$QTDIR/bin:$PATH
export LD_LIBRARY_PATH=$QTDIR/lib:$LD_LIBRARY_PATH
./configure -no-opengl
结果又报错:
In file included from kernel/qt_x11.h:76,
from kernel/qpsprinter.cpp:97:
/usr/X11R6/include/X11/Xft/Xft.h:35:31: freetype/freetype.h: 没有那个 文件或目录
In file included from kernel/qt_x11.h:76,
from kernel/qpsprinter.cpp:97:
/usr/X11R6/include/X11/Xft/Xft.h:52: syntax error before `;' token
/usr/X11R6/include/X11/Xft/Xft.h:86: 'FT_UInt' is used as a type, but is not
defined as a type.
/usr/X11R6/include/X11/Xft/Xft.h:93: 'FT_UInt' is used as a type, but is not
defined as a type.
/usr/X11R6/include/X11/Xft/Xft.h:190: parse error before `*' token
/usr/X11R6/include/X11/Xft/Xft.h:295: parse error before `*' token
/usr/X11R6/include/X11/Xft/Xft.h:354: parse error before `*' token
/usr/X11R6/include/X11/Xft/Xft.h:393: parse error before `*' token
/usr/X11R6/include/X11/Xft/Xft.h:399: parse error before `*' token
/usr/X11R6/include/X11/Xft/Xft.h:408: type specifier omitted for parameter `
FT_UInt'
/usr/X11R6/include/X11/Xft/Xft.h:408: parse error before `,' token
/usr/X11R6/include/X11/Xft/Xft.h:418: parse error before `*' token
/usr/X11R6/include/X11/Xft/Xft.h:461: parse error before `*' token
make[2]: *** [kernel/qpsprinter.o] Error 1
make[2]: Leaving directory `/opt/qt-2.3.2/src'
make[1]: *** [sub-src] Error 2
make[1]: Leaving directory `/opt/qt-2.3.2'
make: *** [init] Error 2解决方法:
先cd /usr/include
ln -s freetype2/freetype freetype然后再回到qt-2.3.2 再make 即可
-
安装qtopia的uuid.h找不到问题
2009-01-07 19:53:43
我的错误信息
......
global1.cpp:39:23: uuid/uuid.h: No such file or directory
global1.cpp: In static member function `static QUuid Global::generateUuid()':
global1.cpp:188: `::uuid_generate' undeclared (first use here)
make[1]: *** [.obj/linux-generic-g++//global1.o] Error 1
make[1]: Leaving directory `/usr/src/qtopia-free-1.7.0/src/libraries/qtopia1'
make: *** [libraries/qtopia1] Error 2
You have new mail in /var/spool/mail/rootQT编译补遗
在安装完整版的RedHat9下,按照前面那个傻瓜教程可以一次编译通过qtopia的开发环境,但是…… 在非完整版的Rh9下面就行不通了。经过无数次的尝试,总结如下:
问题一: 找不到 uuid.h
解决: 下载 e2fsprogs-1.35.tar.gz,解压编译,把 e2fsprogs-1.35/lib/uuid 目录拷贝到 qtopia-free-1.7.0/include
问题二: 找不到 -luuid
把e2fsprogs-1.35/lib/uuid/libuuid.a 文件拷贝到 usr/lib 或者 qtopia-free-1.7.0/lib -
QT安装
2009-01-07 19:37:55
安装:
1.建立本机QTOPIA虚拟平台软件: tmake-1.11.tar.gz //编译工具,如progen与tmake
qtopia-free-1.7.0.tar.gz //QTE的桌面环境程序
qt-embedded-2.3.7.tar.gz //提供qte的库
qt-x11-2.3.2.tar.gz //为了生成相应的QT工具,如designer和qvfb等)首先准备软件安装包:tmake工具安装包 qt-embedded安装包 qt-x11 安装包 和具有友好人机界面的qtopia-free安装包
把软件包下载到提前建立的x86-qtopia目录下.为防止版本的不同而造成的冲突,选择软件包时需要注意一些基本原则,因为qt-x11安装包的两个工具uic和designer产生的源文件会与qt-embedded库一起被编译链接,本着向前兼容的原则,qt-x11安装包的版本必须比qt-embedded安装包的版本旧..1,安装tmake
tar xfz tmake-1.11.tar.gz
[root@jude x86-qtopia]# export TMAKEDIR=/root/x86-qtopia/tmake-1.11
[root@jude x86-qtopia]# export TMAKEPATH=/root/x86-qtopia/tmake-1.11/lib/qws/linux-x86-g++/
[root@jude x86-qtopia]# export PATH=$TMAKEDIR/bin:$PATH2.安装Qt/embedded2.3.7
[root@jude x86-qtopia]# tar xfz qtopia-free-1.7.0.tar.gz[root@jude root]# cd x86-qtopia/
[root@jude x86-qtopia]# cd qt-2.3.7/[root@jude qt-2.3.7]# export QPEDIR="/root/x86-qtopia/qtopia-free-1.7.0"
[root@jude qt-2.3.7]# export QTEDIR="/root/x86-qtopia/qt-2.3.7"
[root@jude qt-2.3.7]# cp /root/x86-qtopia/qtopia-free-1.7.0/src/qt/qconfig-qpe.h src/tools/
[root@jude qt-2.3.7]# ./configure -qvfb -depths 4,8,16,32 -qconfig
[root@jude qt-2.3.7]# make sub-src //精简方式编译开发包.
[root@jude qt-2.3.7]# cd ..
3.安装qt/x11 2.3.2
[root@jude x86-qtopia]# tar xfz qt-x11-2.3.2.tar.gz
[root@jude x86-qtopia]# cd qt-2.3.2/
[root@jude qt-2.3.2]# export QTDIR=$PWD
[root@jude qt-2.3.2]# export PATH=/root/x86-qtopia/qt-2.3.2/bin/:$PATH
[root@jude qt-2.3.2]# export LD_LIBRARY_PATH=/root/x86-qtopia/qt-2.3.2/lib/:$LD_LIBRARY_PATH
[root@jude qt-2.3.2]# ./configure -no-opengl
[root@jude qt-2.3.2]# make
注意在make 之前 需要 先先cd /usr/include
ln -s freetype2/freetype freetype
[root@jude qt-2.3.2]# make -C tools/qvfb
[root@jude qt-2.3.2]# mv tools/qvfb/qvfb bin
[root@jude qt-2.3.2]# cp bin/uic /root/x86-qtopia/qt-2.3.7/bin/
[root@jude qt-2.3.2]# cd ..验证:进入/bin ./desiger 弹出QT界面

(点击有大图)
5.安装Qtopia[root@jude x86-qtopia]# cd qtopia-free-1.7.0
[root@jude qtopia-free-1.7.0]# cd qtopia-free-1.7.0
[root@jude qtopia-free-1.7.0]# export QTDIR=$QTEDIR
[root@jude qtopia-free-1.7.0]#export QPEDIR=$PWD
[root@jude qtopia-free-1.7.0]#export PATH=$QPEDIR/bin:$PATH
[root@jude qtopia-free-1.7.0]#cd src
[root@jude qtopia-free-1.7.0]#./configure 如果环境变量没设好,将会出现错误
global1.cpp:39:23: uuid/uuid.h: 没有那个文件或目录
global1.cpp: In static member function `static QUuid Global::generateUuid()':
global1.cpp:188: `::uuid_generate' undeclared (first use here)
make[1]: *** [.obj/linux-generic-g++//global1.o] Error 1
make[1]: Leaving directory `/root/x86-qtopia/qtopia-free-1.7.0/src/libraries/qtopia1'
make: *** [libraries/qtopia1] Error 2安装 e2fsprogs-1.39
cd e2fsprogs-1.39
./configure -enable-elf-shlibs
make
make install lib/uuid/
问题一: 找不到 uuid.h
解决: 下载 e2fsprogs-1.35.tar.gz,解压编译,把 e2fsprogs-1.35/lib/uuid 目录拷贝到 qtopia-free-1.7.0/include问题二: 找不到 -luuid
把e2fsprogs-1.35/lib/uuid/libuuid.a 文件拷贝到 usr/lib 或者 qtopia-free-1.7.0/lib[root@jude src]# make
[root@jude qtopia-free-1.7.0]#cd ../..
6.安装Qtopia桌面
[root@jude qtopia-free-1.7.0]#cd qtopia-free-1.7.0/src
[root@jude src]# export QTEDIR=$QTEDIR
[root@jude src]#./configure -qtopiadesktop
[root@jude src]#make
[root@jude src]#mv qtopiadesktop/bin/qtopiadesktop ../bin
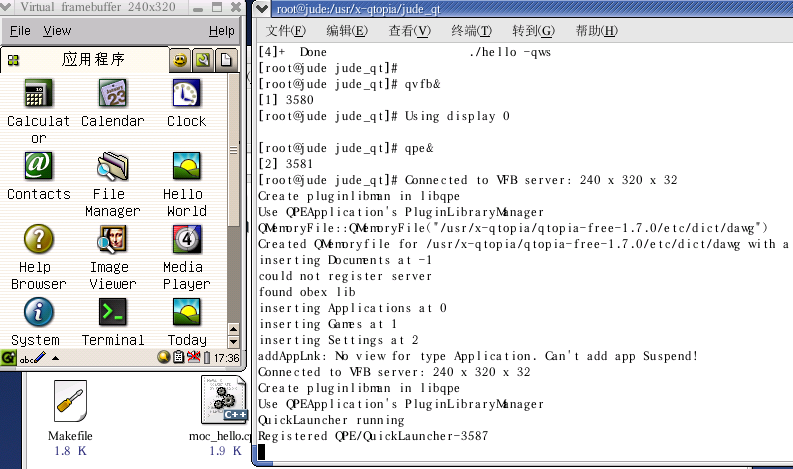
[root@jude src]#cd ..7.在PC机上运行QPE
qvfb&
qpe&
8.添加自己的应用程序到QPE中.
(1)新建一个hello.desktop文件,保存在$QPEDIR/apps/applications
[Desktop Entry]
Comment=A Simply Application Program
Exec=hello
Icon=TodayApp
Type=Application
Name=Hello World
(2)把自己通过QT 等一系列的变换后,得到hello 可执行文件
然后把其保存在$QPEDIR/bin文件夹下


我的栏目
标题搜索
我的存档
数据统计
- 访问量: 144885
- 日志数: 66
- 图片数: 1
- 建立时间: 2009-01-07
- 更新时间: 2014-03-11
