在前后端分离的这种工作模式下,分工明确,各司其职。前端负责展示数据,后端提供数据。然而,在这种过程中对于接口的规范 需要提前制定好。例如根据规范提前模拟数据,这个时候就比较麻烦的。JsonServer这个比较NB了,它可以快速搭建服务端环境,创建json文件,便于调用。然后可以通过下载postman与json-server结合,可以实现数据的增删改查功能。下面是使用过程:
在浏览器中打开 http://jsonplaceholder.typicode.com/ 可以看到里面的一些数据
1.首先安装Node.js (https://nodejs.org/en/)
$ npm install -g json-server (全局安装json-server) Downloading json-server to C:\Users\Administrator\AppData\Roaming\npm\node_modules\json-server_tmp Copying C:\Users\Administrator\AppData\Roaming\npm\node_modules\json-server_tmp\_json-server@0.12.1@json-server to C:\Users\Administrator\AppData\Roaming\npm\node_modules\json-server Installing json-server's dependencies to C:\Users\Administrator\AppData\Roaming\npm\node_modules\json-server/node_modules [1/22] connect-pause@^0.1.0 installed at node_modules\_connect-pause@0.1.0@connect-pause [2/22] errorhandler@^1.2.0 installed at node_modules\_errorhandler@1.5.0@errorhandler [3/22] lodash-id@^0.14.0 installed at node_modules\_lodash-id@0.14.0@lodash-id [4/22] cors@^2.8.4 installed at node_modules\_cors@2.8.4@cors [5/22] json-parse-helpfulerror@^1.0.3 installed at node_modules\_json-parse-helpfulerror@1.0.3@json-parse-helpfulerror [6/22] express-urlrewrite@^1.2.0 installed at node_modules\_express-urlrewrite@1.2.0@express-urlrewrite [7/22] object-assign@^4.0.1 existed at node_modules\_object-assign@4.1.1@object-assign [8/22] compression@^1.7.1 installed at node_modules\_compression@1.7.2@compression [9/22] nanoid@^1.0.1 installed at node_modules\_nanoid@1.0.2@nanoid [10/22] method-override@^2.3.10 installed at node_modules\_method-override@2.3.10@method-override [11/22] chalk@^2.3.0 installed at node_modules\_chalk@2.4.0@chalk [12/22] body-parser@^1.18.2 installed at node_modules\_body-parser@1.18.2@body-parser [13/22] pluralize@^7.0.0 installed at node_modules\_pluralize@7.0.0@pluralize [14/22] please-upgrade-node@^3.0.1 installed at node_modules\_please-upgrade-node@3.0.1@please-upgrade-node [15/22] morgan@^1.9.0 installed at node_modules\_morgan@1.9.0@morgan [16/22] server-destroy@^1.0.1 installed at node_modules\_server-destroy@1.0.1@server-destroy [17/22] express@^4.16.2 installed at node_modules\_express@4.16.3@express [18/22] lodash@^4.11.2 installed at node_modules\_lodash@4.17.5@lodash [19/22] lowdb@^0.15.0 installed at node_modules\_lowdb@0.15.5@lowdb [20/22] yargs@^10.0.3 installed at node_modules\_yargs@10.1.2@yargs [21/22] request@^2.83.0 installed at node_modules\_request@2.85.0@request [22/22] update-notifier@^2.3.0 installed at node_modules\_update-notifier@2.5.0@update-notifier Recently updated (since 2018-04-16): 3 packages (detail see file C:\Users\Administrator\AppData\Roaming\npm\node_modules\json-server\node_modules\.recently_updates.txt) Today: → yargs@10.1.2 ? cliui@^4.0.0(4.1.0) (10:28:35) 2018-04-17 → chalk@^2.3.0(2.4.0) (12:28:37) → chalk@2.4.0 ? supports-color@^5.3.0(5.4.0) (11:57:41) All packages installed (228 packages installed from npm registry, used 9s, speed 492.45kB/s, json 216(2.05MB), tarball 2.37MB) [json-server@0.12.1] link C:\Users\Administrator\AppData\Roaming\npm\json-server@ -> C:\Users\Administrator\AppData\Roaming\npm\node_modules\json-server\bin\index.js |
出现这样的情况,说明执行完成
2.进入你创建的目录里。cd json-server(json-server是我创建的文件名称)
npm init 初始化
This utility will walk you through creating a package.json file. It only covers the most common items, and tries to guess sensible defaults. See `npm help json` for definitive documentation on these fields and exactly what they do. Use `npm install <pkg>` afterwards to install a package and save it as a dependency in the package.json file. Press ^C at any time to quit. package name: (1) version: (1.0.0) description: entry point: (index.js) test command: git repository: keywords: author: license: (ISC) About to write to G:\1\package.json: { "name": "1", "version": "1.0.0", "description": "", "main": "index.js", "scripts": { "test": "echo \"Error: no test specified\" && exit 1" }, "author": "", "license": "ISC" } Is this OK? (yes) |
3.安装json-server依赖
npm install json-server --save
这时候在你项目中会生成node_modules所需要的依赖
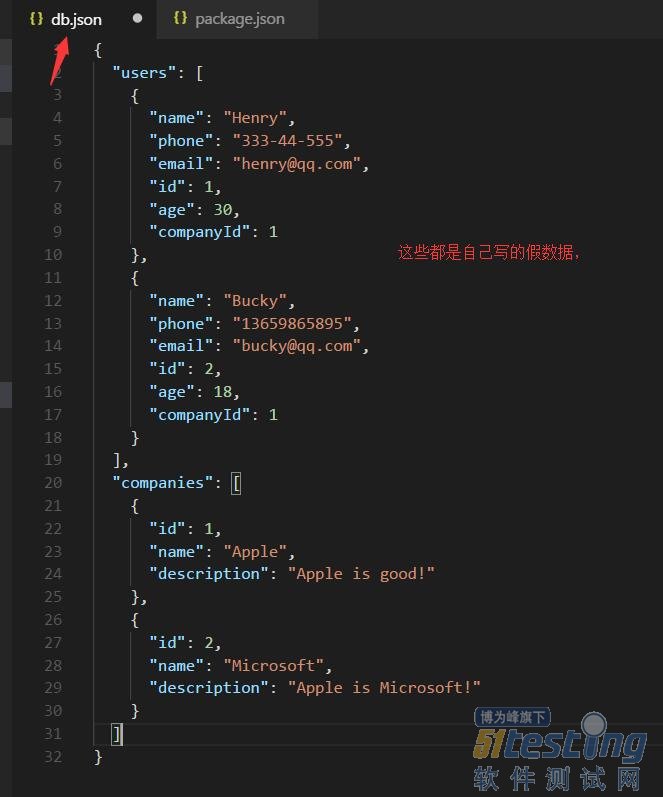
4.在你的文件中创建一个db.json,用于写一些模拟数据
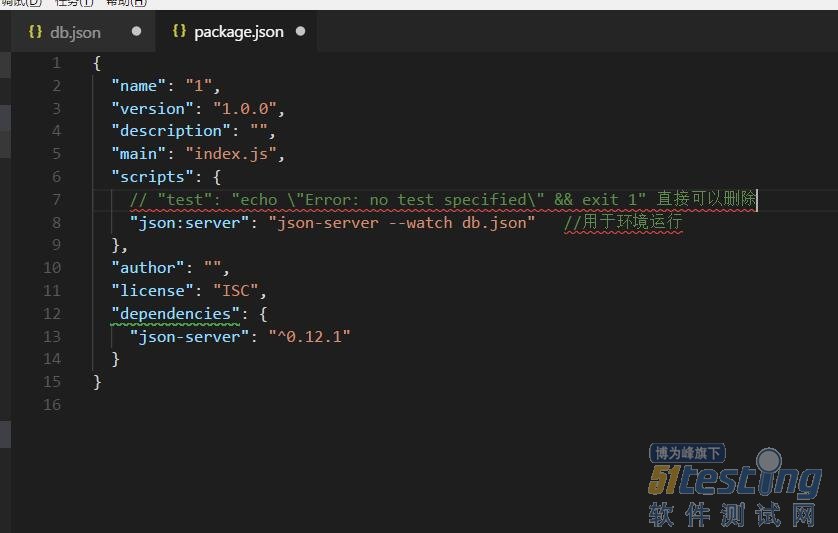
5.在我们的package.json这个文件里,配置一下运行环境
6.运行命令
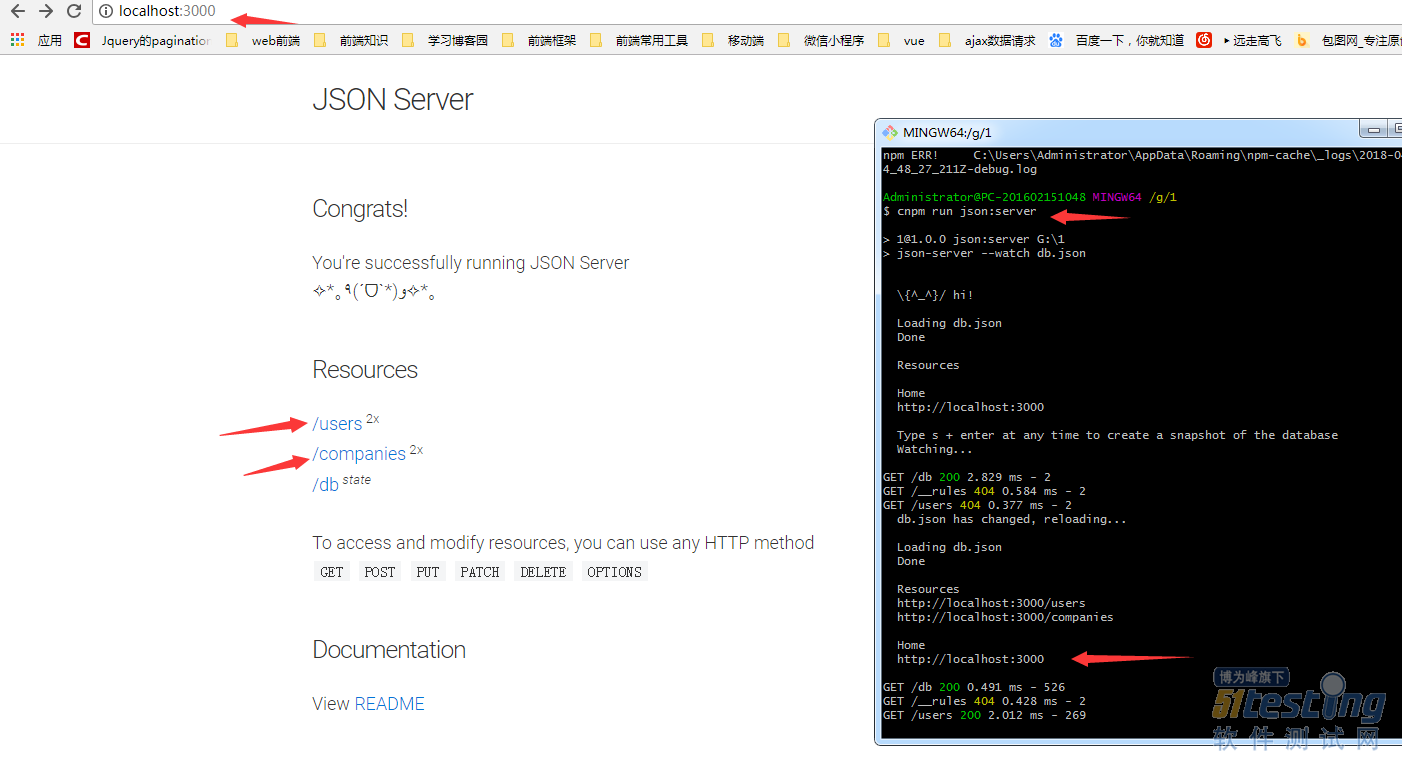
npm run json:server (就是你在package.json配置的命令)
在命令版输入 npm run json:server
在浏览器打开http://localhost:3000/会出现下面内容
在浏览器中可以看到,users中有两个对象,就是我们在db。josn创建的两个数据
7.这些只能查询,却不能添加数据,我们可以通过postman这个软件帮助我们搭建环境实现数据的增删改查功能
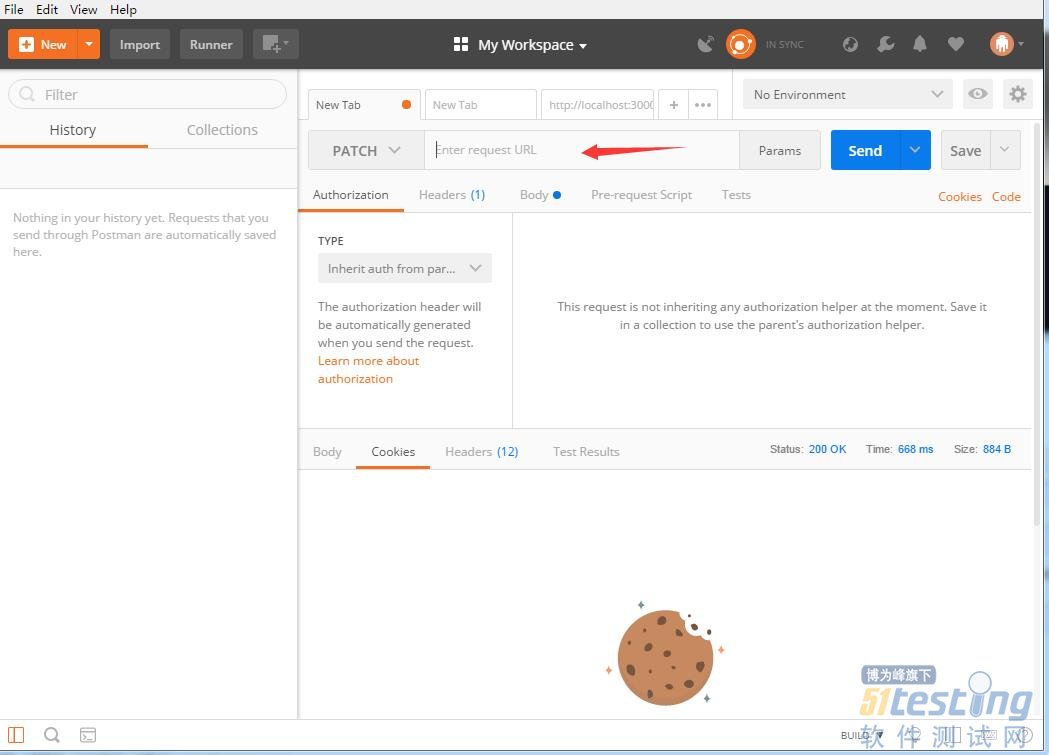
在浏览器中https://www.getpostman.com/自己下载,自己注册登录,此处就不详细介绍了。打开就是下面的界面
8.我们在输入框输入我们的运行的地址http://localhost:3000/users,输入好地址的时候,点击send运行,一定要选择json格式
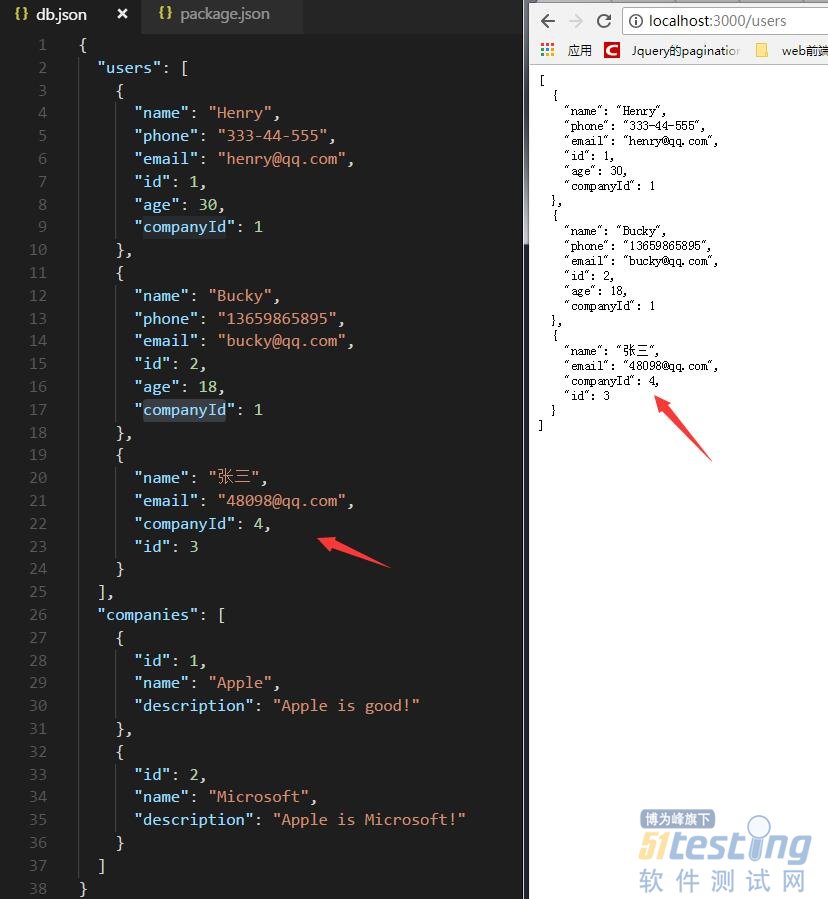
我们可以在浏览器或者在db.json这个文件看到我们已经添加了一个新的数据
如果想实现其他自己可以尝试,
9.在package.json添加一个命令,这时候可以调json-server原本的所有数据,
"scripts": { "json:server": "json-server --watch db.json", "json:server:remote": "json-server http://jsonplaceholder.typicode.com/db" }, |
10.我们再次运行
npm run json:server:remote 这个都端口是运行所有的数据内容,包括json-server自带的数据
npm run json:server 这个端口是运行本地数据
这时候我们只需要调用这些端口就已经可以实现数据的增删改查了。
上文内容不用于商业目的,如涉及知识产权问题,请权利人联系博为峰小编(021-64471599-8017),我们将立即处理。


