

今天我们来看一下如何在Eclipse下使用Java来编写webdriver的case。需要准备的东西:jdk1.6、eclipse、selenium-server-standalone-2.21.0.jar包。我使用的浏览器是Firefox的,要注意一下你的Firefox的版本是否和你的selenium sever的版本匹配。
selenium server可以到selenium的官网下载:http://seleniumhq.org/
首先在eclipse里新建一个java project--Test,然后在Test项目下新建一个文件夹lib,lib原来放selenium的server包。如下图所示:
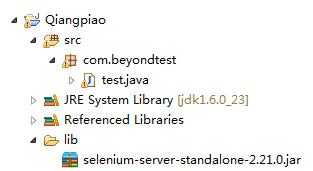
然后将selenium加入到build path里:选中项目右键-->Build Path-->Configure Build path,然后点击add jars-->选我们项目下的selenium server就可以了。

到这里我们的准备就做好了。
下面新建一个java的类,来体验一下selenium webdriver。
<span style="font-size:18px;"> package com.beyondtest; import org.openqa.selenium.By; import org.openqa.selenium.WebDriver; import org.openqa.selenium.firefox.FirefoxDriver; public class testbaidu { /** * @param args */ public static void main(String[] args) { // TODO Auto-generated method stub //设置浏览器driver WebDriver driver; driver=new FirefoxDriver(); //打开百度的首页 driver.get("http://www.baidu.com"); //找到输入框,输入“北京博测科技”,并单击百度一下按钮 driver.findElement(By.id("kw")).clear(); driver.findElement(By.id("kw")).sendKeys("北京博测科技"); driver.findElement(By.id("su")).click(); //关闭浏览器 driver.close(); } } </span> |
OK,强大吧。接下来我们将一点一点深入的去学习这个强大的工具。


