

01 目标
其中,Appium 负责驱动 App 端自动化运行,mitmproxy 负责截取请求数据并解析保存到数据库。
今天的目的是爬取「当当网」的所有数据,并保存到 MongoDB 数据库当中。
02 准备工作
首先,需要在 PC 上安装好 Charles 和 Appium Desktop,并配置好 mitmproxy 环境。
# 安装mitmproxy依赖包 pip3 install mitmproxy # 安装pymongodb pip3 install pymongo |
03 爬取思路
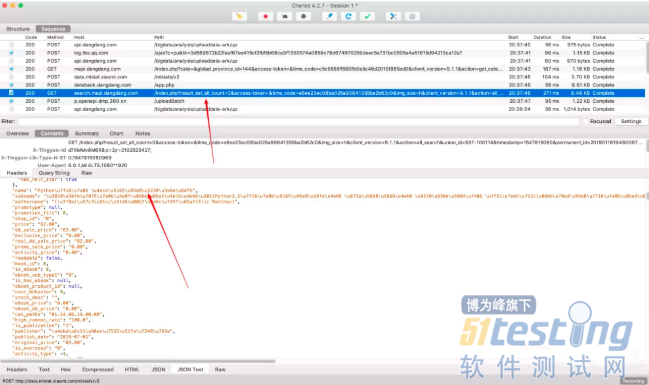
1. 在配置好手动代理的情况下,打开 Charles 实时捕获客户端的发起的网络请求。
打开当当网搜索商品的页面,搜索关键字「Python」,可以在 Charles 查看到当前请求的 URL 地址包含:「word=Python」
编写 mitmproxy 的执行脚本文件,重写 response() 函数,通过对请求的 URL 进行过滤,对有用的数据进行整理并保存到 MongoDB 数据库当中。
class DangDangMongo(object): """ 初始化MongoDB数据库 """ def __init__(self): self.client = MongoClient('localhost') self.db = self.client['admin'] self.db.authenticate("root", "xag") self.dangdang_book_collection = self.db['dangdang_book'] def response(flow): # 过滤请求的URL if 'keyword=Python' in request.url: data = json.loads(response.text.encode('utf-8')) # 书籍 products = data.get('products') or None product_datas = [] for product in products: # 书ID product_id = product.get('id') # 书名 product_name = product.get('name') # 书价格 product_price = product.get('price') # 作者 authorname = product.get('authorname') # 出版社 publisher = product.get('publisher') product_datas.append({ 'product_id': product_id, 'product_name': product_name, 'product_price': product_price, 'authorname': authorname, 'publisher': publisher }) DangDangMongo().dangdang_book_collection.insert_many(product_datas) print('成功插入数据成功') |
先打开客户端的手动代理监听 8080 端口,然后执行「mitmdump」命令,然后滚动商品界面,发现数据到写入到数据库中了。
| mitmdump -s script_dangdang.py |
2. 下面我们要利用 Appium 帮我们实现 自动化。
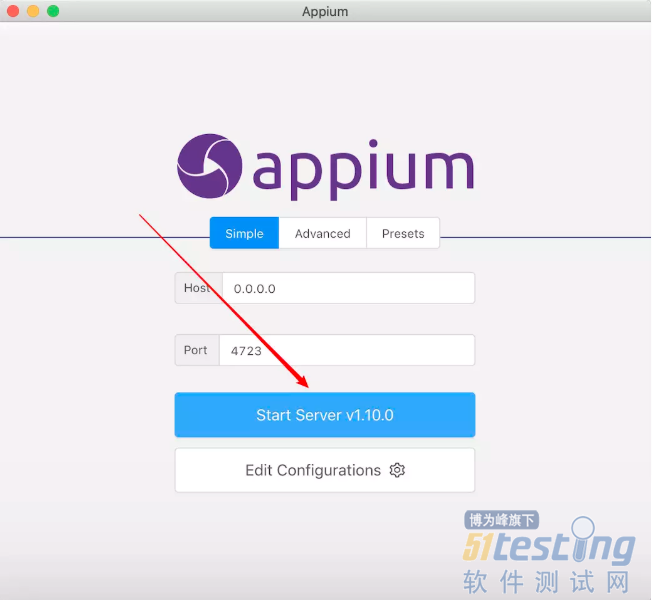
首先打开 Appium Desktop,并启动服务。
打开 Android Studio,利用菜单栏的 Build-Analyze APK 分析当当网的安卓应用,打开 AndroidManifest.xml
可以发现应用包名和初始化 Activity 分别为:
com.dangdang.buy2、com.dangdang.buy2.StartupActivity

获取到包名和初始 Activity 后,就可以利用 WebDriver 去模拟打开当当网 APP。
self.caps = { 'automationName': DRIVER, 'platformName': PLATFORM, 'deviceName': DEVICE_NAME, 'appPackage': APP_PACKAGE, 'appActivity': APP_ACTIVITY, 'platformVersion': ANDROID_VERSION, 'autoGrantPermissions': AUTO_GRANT_PERMISSIONS, 'unicodeKeyboard': True, 'resetKeyboard': True } self.driver = webdriver.Remote(DRIVER_SERVER, self.caps) |
接着使用 Android SDK 自带的工具 uiautomatorviewer 获取到元素信息,使用 Appium 中的 WebDriver 去操作 UI 元素。

第一次打开应用的时候,可能会出现红包雨对话框、新人专享红包对话框、切换城市对话框,这里需要通过元素 ID 获取到关闭按钮,执行点击操作来关闭这些对话框。
这里创建一个 新的线程 来单独处理这些对话框。
class ExtraJob(threading.Thread): def run(self): while self.__running.isSet(): # 为True时立即返回, 为False时阻塞直到内部的标识位为True后返回 self.__flag.wait() # 1.0 【红包雨】对话框 red_packet_element = is_element_exist(self.driver, 'com.dangdang.buy2:id/close') if red_packet_element: red_packet_element.click() # 1.1 【新人专享券】对话框 new_welcome_page_sure_element = is_element_exist(self.driver, 'com.dangdang.buy2:id/dialog_cancel_tv') if new_welcome_page_sure_element: new_welcome_page_sure_element.click() # 1.2 【切换位置】对话框 change_city_cancle_element = is_element_exist(self.driver, 'com.dangdang.buy2:id/left_bt') if change_city_cancle_element: change_city_cancle_element.click() extra_job = ExtraJob(dangdang.driver) extra_job.start() |
接下来就是点击搜索按钮,然后输入内容,执行点击搜索对话框。
# 1.搜索框 search_element_pro = self.wait.until( EC.presence_of_element_located((By.ID, 'com.dangdang.buy2:id/index_search'))) search_element_pro.click() search_input_element = self.wait.until( EC.presence_of_element_located((By.ID, 'com.dangdang.buy2:id/search_text_layout'))) search_input_element.set_text(KEY_WORD) # 2.搜索对话框,开始检索 search_btn_element = self.wait.until( EC.element_to_be_clickable((By.ID, 'com.dangdang.buy2:id/search_btn_search'))) search_btn_element.click() # 3.休眠3秒,保证第一页的内容加载完全 time.sleep(3) |
待第一页的数据加载完全之后,可以一直向上滚动页面,直到数据全部被加载完全,数据会由 mitmproxy 自动保存到 MongoDB 数据库当中。
while True: str1 = self.driver.page_source self.driver.swipe(FLICK_START_X, FLICK_START_Y + FLICK_DISTANCE, FLICK_START_X, FLICK_START_X) time.sleep(1) str2 = self.driver.page_source if str1 == str2: print('停止滑动') # 停止线程 extra_job.stop() break print('继续滑动' |
04 结果
首先使用 mitmdump 开启请求监听的服务,然后执行爬取脚本。
App 会自动打开,执行一系列操作后,到达商品界面,然后自动滑动界面,通过 mitmproxy 自动把有用的数据保存到 MongoDB 数据库中。


上文内容不用于商业目的,如涉及知识产权问题,请权利人联系博为峰小编(021-64471599-8017),我们将立即处理。


