什么是Mantis
MantisBT is a free popular web-based bugtracking system (feature list). It is written in the PHP scripting language and works with MySQL, MS SQL, and PostgreSQL databases and a webserver. MantisBT has been installed on Windows, Linux, Mac OS, OS/2, and others. Almost any web browser should be able to function as a client. It is released under the terms of the GNU General Public License (GPL).

Mantis是一个BUG管理系统。主要特点如下:
1、 用php写的系统,安装方便,不用像 bugzilla 那样安装那么多perl支持;
2、 系统相对简单轻磅,使用简单;
3、 出色的多语支持,对于对日开发等公司非常合适;
界面图示:

在线演示地址:http://www.futureware.biz/mantisdemo
环境搭建及Mantis安装、配置
由于Mantis是用php写的系统,而要调试php程序当然要用到apache+php+mysql,而apache+php+mysql配置起来却又是很麻烦的事,这还不包括环境冲突、、、等等,这些又或者是那些导致配置失败的问题。但刚巧有这么一个套件可以省去这些以前是需要解决的问题,这个套件就是EasyPHP了。EasyPHP集成了:Apache、PHP、MySQL、PhpMyAdmin。
以上软件可参考文章最后的参考资料。
适用范围
本文介绍基于Windows下的Mantis BUG管理系统的搭建。
软件下载
Mantis下载地址:http://www.mantisbt.org/
EasyPHP下载地址:http://www.easyphp.org/
本文以mantis-1.1.0a4+ EasyPHP-3.1为演示版本,并测试通过。
安装EasyPHP
安装EasyPHP很简单,双击下载到的EasyPHP-3.1.exe,然后一直默认点击Next即可安装完成。当然啦,在License Agreement页面是必须选择I Access The Agreement……
软件默认目录:C:"Program Files"EasyPHP3.1
安装进度…

Installing…

Completing!
EasyHPH成功安装!勾选上“Open Help”、“Launch EasyPHP”,点击“Finish”。可看到如下页面:

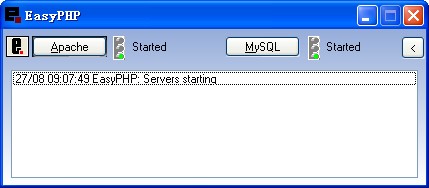
若成功运行时,双击在Windows托盘的  图标,可看到如下图所示,Apache、MySQL的右边都是显示“Started”并亮绿灯的。
已知问题:
1、 若Apache没有正常运行,可能是因为Apache的默认使用的80端口被占用(Apache端口修改方法请继续往下阅读…);
2、 若找不到原因,请重新启动电脑,据说重新启动电脑可以解决80%的问题,希望你遇到的不是余下的20%中的…
安装Mantis
1、 将下载到的mantis-1.1.0a4.rar解压到mantis文件夹;
2、 EasyPHP安装目录,打开C:"Program Files"EasyPHP3.1"www"
3、 将mantis文件夹复制到C:"Program Files"EasyPHP3.1"www"下;
安装Phpmyadmin
1、 打开C:"Program Files"EasyPHP3.1
2、 将phpmyadmin文件夹剪切到C:"Program Files"EasyPHP3.1"www"
1、 右键Windows托盘的 图标,选择“Local Web”,(或者在IE地址中输入“http://127.0.0.1/”)可看到如下页面:

2、 点击选择“mantis”,进入页面:

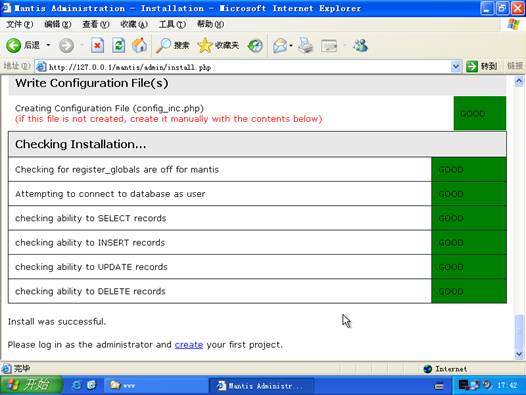
3、 不用修改/填写任何值,直接点击页面最下方的“Install/Upgrade Database”按钮
4、 成功后可看到如下页面:
2 OK,到此为止,Mantis系统已经搭建成功了。下面立刻验证一下是否已配置成功!
1、 再次右键Windows托盘的 图标,选择“Local Web”,(或者在IE地址中输入“http://127.0.0.1/”)可看到如下页面:

2、 点击选择“mantis”(或可省略步骤,直接在IE地址中输入“http://127.0.0.1/mantis/login_page.php”),进入页面:

配置完成的Mantis的只有一个默认的系统管理员用户:
账号:administrator
密码:root
就这么简单,一个Bug管理系统就配置完成了,Mantis已经可以投入使用啦!但——实际使用中还是会有问题产生,如:Mantis配置完成后,默认配置完成的系统是English版本的,且只支持English,不支持Chinese,具体表现在:若在任何一个字段中输入中文成功保存后,再显示出来就是乱码(而解决中文显示乱码的问题很是棘手,且根据情况的不同解决的方法也不同,在网上搜索一下就有一大堆。。。),具体解决方法请继续往下Look……
中文版配置
配置完成时,Mantis默认为English系统,而要使用中文版Mantis则需要修改配置文件。
2 配置方法:
打开Mantis目录(C:"Program Files"EasyPHP3.1"www"mantis"),用记事本打开config_defaults_inc.php 文件,找到如下代码片段:
。。。。。。 # --- language settings ----------- # If the language is set to 'auto', the actual # language is determined by the user agent (web browser) # language preference. $g_default_language = 'english'; 。。。。。。 |
将english 改为chinese_simplified
修改完成后的代码片段如下所示:
…… # --- language settings ----------- # If the language is set to 'auto', the actual # language is determined by the user agent (web browser) # language preference. $g_default_language = 'chinese_simplified'; …… |
2 验证配置是否成功:
再次在IE中登录Mantis系统“http://127.0.0.1/mantis/login_page.php”),进入页面:

OK,成功了。登录后,也一样是全中文的界面:
局域网访问
配置完成时,Mantis默认为只能够本机访问,若要在局域网内访问则需要修改Apache的配置文件。
2 配置方法:
打开apache目录(C:"Program Files"EasyPHP3.1"apache"conf"),用记事本打开httpd.conf 文件,找到如下代码片段:
。。。。。。 # # Listen: Allows you to bind Apache to specific IP addresses and/or # ports, instead of the default. See also the <VirtualHost> # directive. # # Change this to Listen on specific IP addresses as shown below to # prevent Apache from glomming onto all bound IP addresses. # #Listen 12.34.56.78:80 Listen 127.0.0.1:80 。。。。。。 |
在Listen 127.0.0.1:80下一行加入一段代码 Listen 192.168.1.101:80
注:192.168.1.101为Mantis服务器的IP地址
修改完成后的代码片段如下所示:
…… # # Listen: Allows you to bind Apache to specific IP addresses and/or # ports, instead of the default. See also the <VirtualHost> # directive. # # Change this to Listen on specific IP addresses as shown below to # prevent Apache from glomming onto all bound IP addresses. # #Listen 12.34.56.78:80 Listen 127.0.0.1:80 Listen 192.168.1.101:80 …… |
2 验证配置是否成功:
在局域网任一电脑中通过IE登录Mantis系统
http:// 192.168.1.101/mantis/login_page.php即可正常访问。
补充:mantis不使用邮件系统(Email)的配置::
修改配置文件.../mantis/config_inc.php
$g_enable_email_notification = OFF; 保存、关闭
1、用管理员登录mantis,创建一个用户,输入账号和真实姓名,Email可以随便填写,创建用户,不过此时创建的用户密码为空,可以由创建的用户登录mantis后自行修改。
2、如果用户忘记了密码该怎么办?可以让管理员登录mantis,进入管理--用户管理--选择用户--重设密码,则该用户的密码将被置为空,由该用户登录后修改。

