一、Restful接口实例
通过构建一个Restful接口实例,更加直接深入了解Restful接口的开发。
二、构建一个简单实例
1.创建项目参考
https://blog.csdn.net/u010886217/article/details/85239110
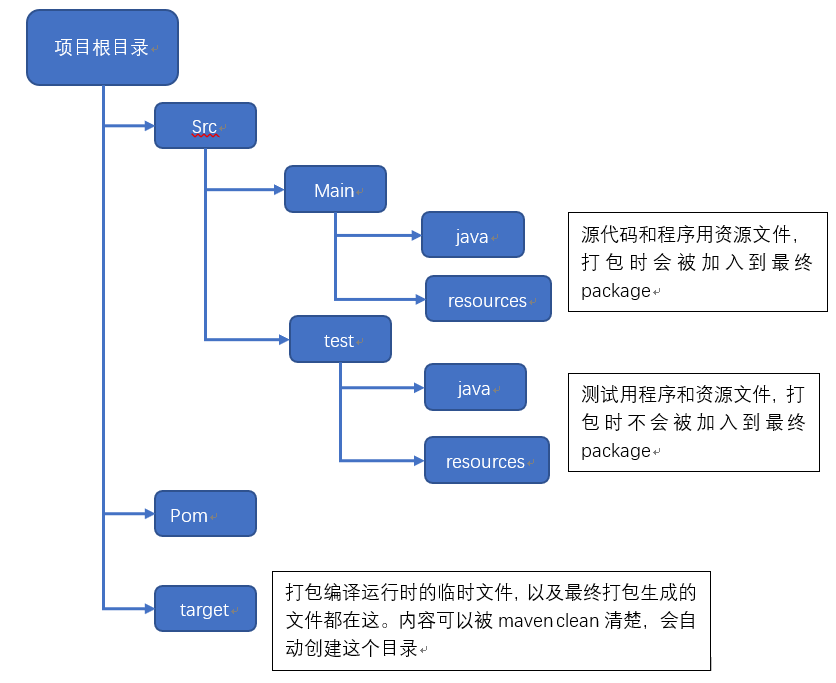
2.项目结构

Maven项目结构

3.创建第一个controller测试类:HelloworldController
package com.example.demo;
import org.springframework.web.bind.annotation.GetMapping;
import org.springframework.web.bind.annotation.RequestMapping;
import org.springframework.web.bind.annotation.RestController;
import java.util.HashMap;
import java.util.Map;
@RestController
@RequestMapping("/helloworld")
public class HelloworldController {
    @GetMapping
    public Map<String,Object> sayHelloworld(){
        Map<String,Object> result=new HashMap<>();
        result.put("message","hello world!");
        result.put("message2","hello world 2!");
        result.put("message3","hello world 3!");
        return result;
    }
}
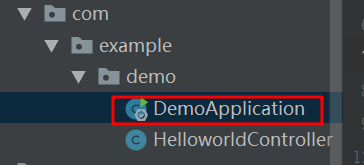
运行启动类:DemoApplication

4.测试刚刚命令,访问http://localhost:8080/helloworld,返回结果

三、构建一个复杂实例
1. DTO类:TvSeriesDto.class,功能:传输数据电视剧系列的对象
package com.example.demo;
import com.sun.xml.internal.ws.spi.db.DatabindingException;
import java.util.Date;
public class TvSeriesDto {
    private int id;
    private String name;
    private int seasonCount;
    private Date originRelease;
    //构造函数
    public TvSeriesDto(){
    }
    public TvSeriesDto(int id,String name,int seasonCount,Date originRelease){
        this.id=id;
        this.name=name;
        this.seasonCount=seasonCount;
        this.originRelease=originRelease;
    }
    public int getId() {
        return id;
    }
    public void setId(int id) {
        this.id = id;
    }
    public String getName() {
        return name;
    }
    public void setName(String name) {
        this.name = name;
    }
    public int getSeasonCount() {
        return seasonCount;
    }
    public void setSeasonCount(int seasonCount) {
        this.seasonCount = seasonCount;
    }
    public Date getOriginRelease() {
        return originRelease;
    }
    public void setOriginRelease(Date originRelease) {
        this.originRelease = originRelease;
    }
}
2. 调用类
package com.example.demo;
import org.springframework.web.bind.annotation.GetMapping;
import org.springframework.web.bind.annotation.RequestMapping;
import org.springframework.web.bind.annotation.RestController;
import java.util.*;
@RestController
public class HelloworldController {
//    @GetMapping
    @RequestMapping("/helloworld")
    public Map<String,Object> sayHelloworld(){
        Map<String,Object> result=new HashMap<>();
        result.put("message","hello world!");
        result.put("message2","hello world 2!");
        result.put("message3","hello world 3!");
        return result;
    }
    /**
     * 获取所有电视节目列表
     * @return
     */
    @RequestMapping("/getall")
    public List<TvSeriesDto> getAll(){

        List<TvSeriesDto> list=new ArrayList<>();
        Calendar calendar=Calendar.getInstance();
        calendar.set(2016,Calendar.OCTOBER,12,0,0);
        list.add( new TvSeriesDto(1,"WestWorld",1,calendar.getTime()));
        return list;
    }
}
运行程序DemoApplication,访问http://localhost:8080/getall

3.修改日期格式(全局)
修改..\resources\application.properties文件为..\resources\application.yml,然后添加
spring:
  jackson:
    date-format: yyyy-MM-dd #如果使用字符串型表示,用这行设置
    timezone: GMT+8
    serialization:
      write-dates-as-timestamps: false #使用数值timestamp表示日期,false表示不用这数字;true表示用数字
重新访问接口http://localhost:8080/getall,则原始数据:
[{"id":1,"name":"WestWorld","seasonCount":1,"originRelease":1476201605562}]当前数据:
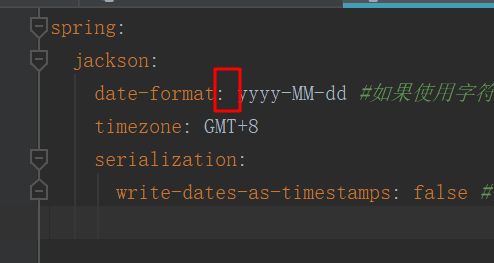
[{"id":1,"name":"WestWorld","seasonCount":1,"originRelease":"2016-10-11"}]注意yml文件格式
(1)每行缩进是两个空格
(2)冒号后面要有一个空格

(至此,一个基于springboot框架的初始项目构建好了)