ЎЎЎЎ5. ёщҫЭЧФјәРиЗуЈ¬ХТөҪ¶ФУҰ°жұҫөДphp-jsonҝв
ЎЎЎЎПВФШөШЦ·:ЎЎwgethttp://pkgs.fedoraproject.org/repo/pkgs/php-json/php-json-ext-1.2.1.tar.bz2/e06e701412a055f3372775216ec3d604/php-json-ext-1.2.1.tar.bz2
ЎЎЎЎ6. Ц®З°өДLAMPЖҪМЁЧјұёәГЈ¬ЦШЖфmysqld and httpd·юОсЖчЈ¬
ЎЎЎЎҪУЧЕЦҙРРПа№ШІЩЧчЈ¬°ІЧ°php-jsonА©Х№
#ҪвС№ОДјюЈ¬ІўҪшРРөҪДҝВј # tar -xjf php-json-ext-1.2.1.tar.bz2 #ҪшИлөұЗ°В·ҫ¶Ј¬ІўК№УГөұЗ°ПөНіphpizeЛўРВconfigureОДјю # cd php-json-ext-1.2.1 # phpize Configuring for: PHP Api Version: 20041225 Zend Module Api No: 20050922 Zend Extension Api No: 220051025 #ҝЙТФҝҙөҪТФconfigureөИОДјюТСҫӯЛўРВөҪөұЗ°өДКұјдБЛЈ® # ll total 1468 -rw-r--r-- 1 10008 10008 66540 Jun 18 12:13 acinclude.m4 -rw-rw-r-- 1 10008 10008 298049 Jun 18 12:13 aclocal.m4 drwxr-xr-x 2 root root 4096 Jun 18 12:13 autom4te.cache drwxrwxr-x 2 10008 10008 4096 Jun 18 12:13 build -rwxr-xr-x 1 10008 10008 42037 Jun 18 12:13 config.guess -rw-rw-r-- 1 10008 10008 1610 Mar 31 2006 config.h.in -rw-rw-r-- 1 10008 10008 2139 Jan 31 2006 config.m4 -rwxr-xr-x 1 10008 10008 30253 Jun 18 12:13 config.sub -rwxrwxr-x 1 10008 10008 658032 Jun 18 12:13 configure #ҪшРРД¬ИПөұЗ°В·ҫ¶ұаТлЈ¬ҝЙТФҝҙөҪ»бЙъіЙТ»ёцОТГЗРиТӘөДДЈҝй # ./configure # make Libraries have been installed in: /root/php-json-ext-1.2.1/modules If you ever happen to want to link against installed libraries in a given directory, LIBDIR, you must either use libtool, and specify the full pathname of the library, or use the `-LLIBDIR' flag during linking and do at least one of the following: - add LIBDIR to the `LD_LIBRARY_PATH' environment variable during execution - add LIBDIR to the `LD_RUN_PATH' environment variable during linking - use the `-Wl,--rpath -Wl,LIBDIR' linker flag - have your system administrator add LIBDIR to `/etc/ld.so.conf' See any operating system documentation about shared libraries for more information, such as the ld(1) and ld.so(8) manual pages. ---------------------------------------------------------------------- Build complete. (It is safe to ignore warnings about tempnam and tmpnam). #УЙҙЛОТГЗҝЙТФЦӘөАЈ¬ЖдКөYUM°ІЧ°өДLAMPҙҙҪЁөДДЈҝй·ЕЦГФЪ/usr/lib64/php/modules/Ј¬ЙПГжөДconfigureјЗВјТІІ»М«ҝЙҝҝЈ® # make install Installing shared extensions: /usr/lib64/php/modules/ # ll /usr/lib64/php/modules/json.so -rwxr-xr-x 1 root root 92750 Jun 18 12:14 /usr/lib64/php/modules/json.so |
ЎЎЎЎ7. php-json СйЦӨ
ЎЎЎЎЧцНкҪшРРКэҫЭИ·ИПЈ¬КЗФЛО¬БјәГөДП°№ЯЎЈЦШЖфhttpd·юОсЖчТФјУФШPHPЕдЦГЈ¬НЁ№эјтөҘөДphpinfoәҜКэЈ¬
ЎЎЎЎТФИ·ИПТСҫӯЦ§іЦjson
ЎЎЎЎspacer.gif@ХвКЗҫНІ»·ЕНјЈ¬ҙујТ¶јЦӘөАЈ¬РиТӘНЁ№эphpТіГжЈ¬БЛҪвҙЛҙҰphpТСҫӯЦ§іЦПа№ШДЈҝй
ЎЎЎЎ################################·ЦҪзПЯ##########################################
ЎЎЎЎ8. КөјК°ІЧ°bugfreeИнјю
ЎЎЎЎЈЈҪвС№ДҝВјЈ¬ІўТЖөҪhttpd DocumentRootПВЈ¬ФЩНЁ№эдҜААЖч·ГОКТФПВВ·ҫ¶Јә
ЎЎЎЎ# unzip bugfree3.0.4.zip
ЎЎЎЎ# mv bugfree3.0.4 /var/www/html/bugfree
ЎЎЎЎ# chown -R apache.apache /var/www/html/bugfree
ЎЎЎЎ9. ·ГОКПВГжБ¬ҪУЈ¬јҙҝЙҪшРРТіГж°ІЧ°№ӨЧчЈ¬ёщҫЭЧФјәЗйҝцөчХы
ЎЎЎЎhttp://192.168.0.107/bugfree/install
ЎЎЎЎbugfree°ІЧ°К®·ЦјтөҘЈ¬Ц»РиТӘИэёцІҪЦијҙҝЙЈ®
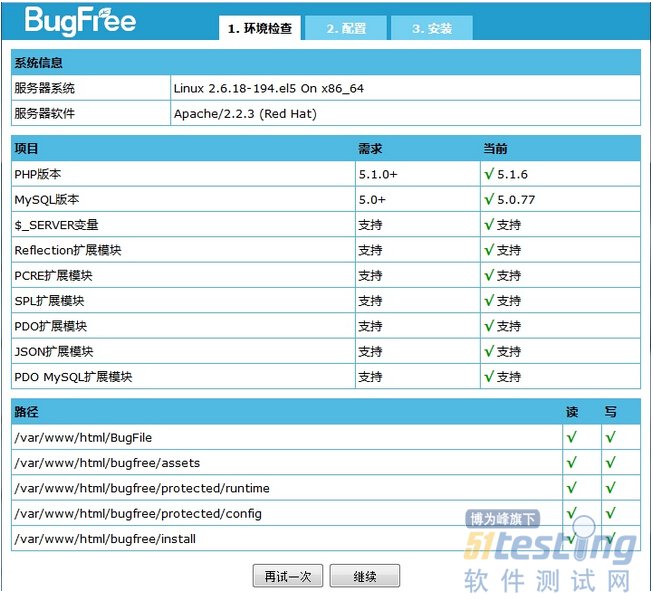
ЎЎЎЎ9.1 »·ҫіјмІйЈ¬Из№ыУРІ»·ыәПөДДЪИЭЈ¬°ҙТӘЗуМнјУјҙҝЙЈ®
ЎЎЎЎЙПГжИз№ыГ»УР°ІЧ°ТӘЗуЧјұёLAMPөДИнјюЈ¬ФЪ»·ҫіјмІйКұ»бұЁҙнөДЎЈ
ЎЎЎЎ9.2 ФЪКэҫЭҝвҙҙҪЁПаУҰУГ»§Ј¬ҪзГж»бНщЧФ¶ҜөчУГЈ¬НщАпГжҙҙҪЁұнёсЈ®
ЎЎЎЎПёҝҙТ»ПВДЗёцҙҙҪЁКэҫЭұнөДОДјюЈ¬ЛщҙҙҪЁөДұнёсҫшҙуІҝ·ЦКЗINNODBҙжҙўТэЗжҙҙҪЁөДұнёсЈ®
ЎЎЎЎcreate database bugfree;
ЎЎЎЎgrant all privileges on bugfree.* to bugfree@localhost identified by "xxxx";
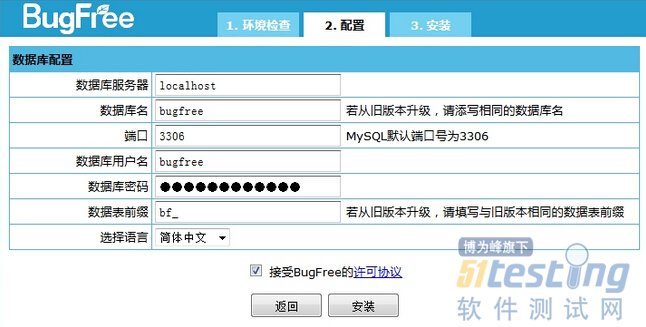
ЎЎЎЎ9.3 МоРҙКэҫЭҝвБ¬ҪУРЕПўЈ¬ҝЙТФИГУҰУГУлКэҫЭҝвҪ»»Ҙ
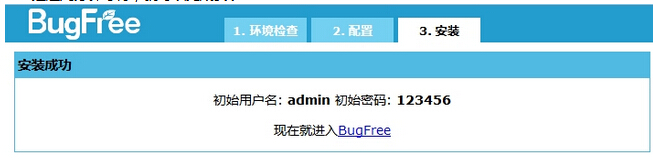
ЎЎЎЎ9.4 ҫӯ№эјё·ЦЦУөИҙэЈ¬ҫНҝЙТФНкіЙ°ІЧ°Ј®