

POM是 Project Object model 的缩写,是一个 XML 文件,它构成了 Maven 的基本基本单元。它存储有关项目的信息,例如版本、描述等,还包含配置详细信息,例如依赖项,Maven 使用这些信息来构建项目并使我们的代码正常工作。
<project xmlns="http://maven.apache.org/POM/4.0.0" xmlns:xsi="http://www.w3.org/2001/XMLSchema-instance" xsi:schemaLocation="http://maven.apache.org/POM/4.0.0 https://maven.apache.org/xsd/maven-4.0.0.xsd">
<modelVersion>4.0.0</modelVersion>
<groupId>selenium_testng</groupId>
<artifactId>selenium_testng</artifactId>
<version>0.0.1-SNAPSHOT</version>
<build>
<sourceDirectory>src</sourceDirectory>
<plugins>
<plugin>
<artifactId>maven-compiler-plugin</artifactId>
<version>3.8.1</version>
<configuration>
<release>16</release>
</configuration>
</plugin>
</plugins>
</build>
<dependencies>
<dependency>
<groupId>org.seleniumhq.selenium</groupId>
<artifactId>selenium-java</artifactId>
<version>3.141.59</version>
</dependency>
<dependency>
<groupId>org.testng</groupId>
<artifactId>testng</artifactId>
<version>7.1.0</version>
<scope>test</scope>
</dependency>
</dependencies>
</project>
第 1 步:创建一个包并将其命名为test。这个包将包含我们所有的测试类文件。
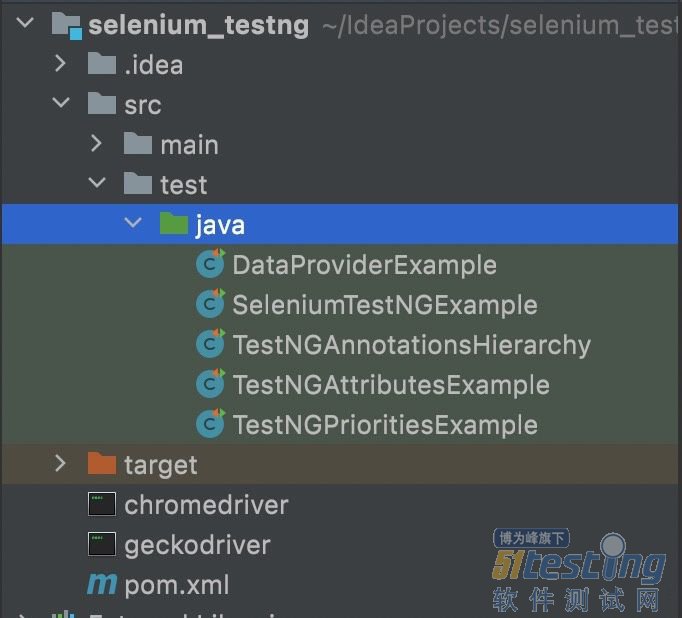
第 2 步:在这个包中,添加一个新类VerifySetup,添加以下代码并保存。
package test;
import org.testng.annotations.Test;
public class VerifySetup {
@Test
public void verifySetup()
{
System.out.println("TestNG setup is working fine");
}
}
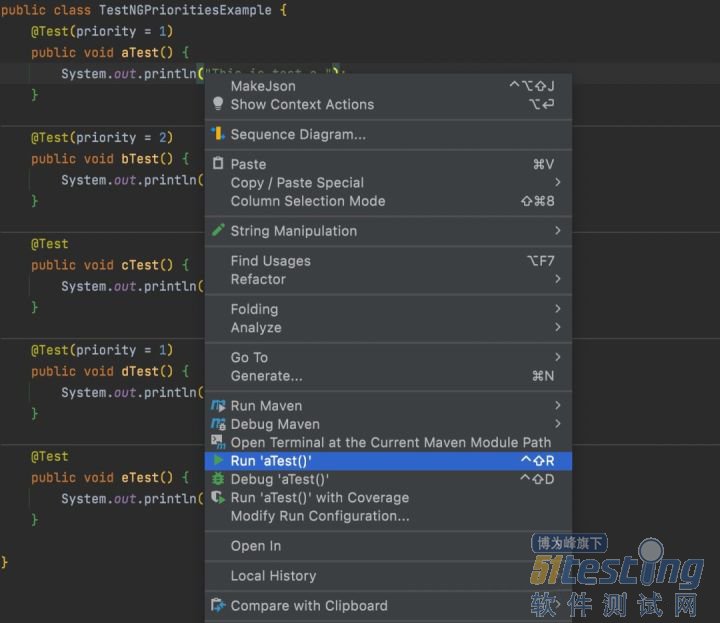
第 3 步:现在将其作为 TestNG 测试执行以验证设置是否OK。为此选择方法名,右键单击它,选择Run As然后单击TestNG Test。
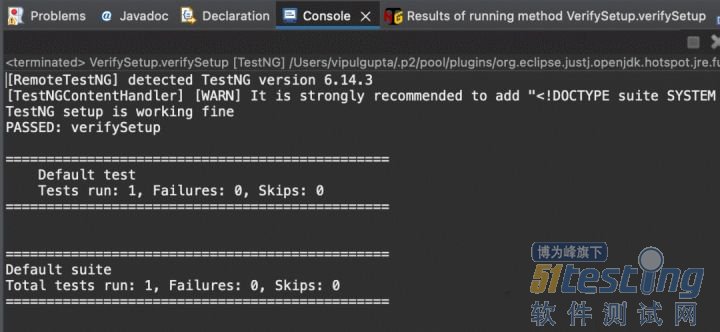
成功执行后,输出应如下所示。这验证了我们的 TestNG 设置是OK的,并且可以执行相同的步骤来执行我们在本教程中添加的更多测试。
TestNG 注解和属性
TestNG 中的注解是一些预定义的关键字,它们有助于控制自动化脚本在适当的流程中的执行。
package test;
import org.testng.annotations.Test;
public class UnAnnotatedTestExample {
@Test
public void testWithAnnotation()
{
System.out.println("This test is annotated");
}
public void testWithoutAnnotation()
{
System.out.println("This test is not annotated");
}
}
在上面的示例中,我们添加了两个测试用例,一个用例带有@Test 注解,一个没有。所以执行测试期望结果是只执行一个带有注解的,另一个则不会被执行。让我们执行该类并验证这一点。
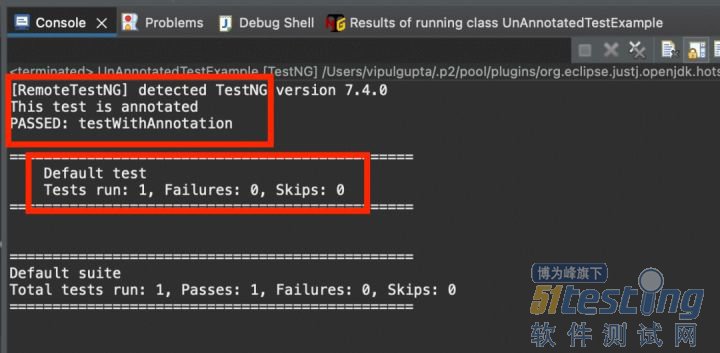
从输出中可以清楚地看出,只有带有注解的情况才被执行。这里要注意的另一件事是,输出的测试运行结果也将测试用例的总数显示为 1,这是因为 TestNG 从 @Test 注解中读取测试用例的数量,而我们在文件中只有一个这样的用例。
TestNG 注解还提供与它们关联的方法、类或测试套件的相关信息。这些通过添加@前缀来表示。让我们一一学习下这些注解,后面的代码样例中会使用它们。
注解类型
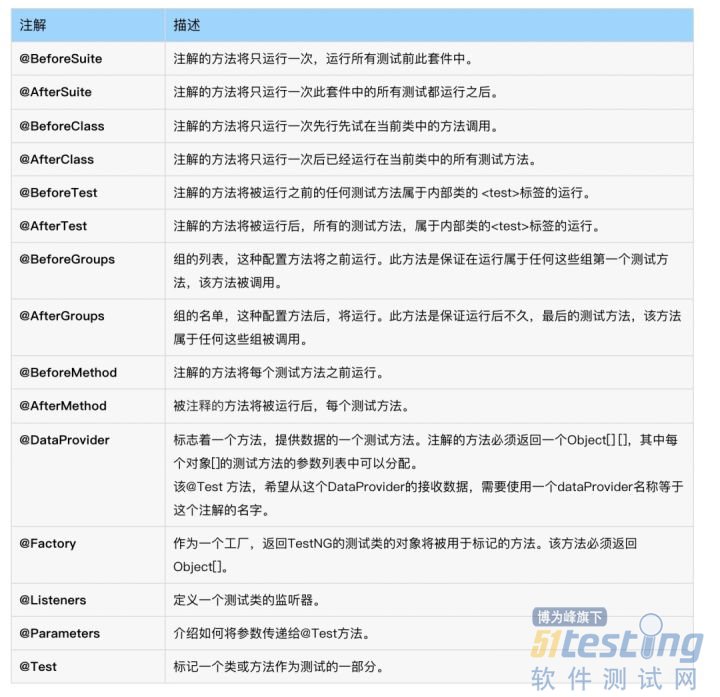
注解的层次结构
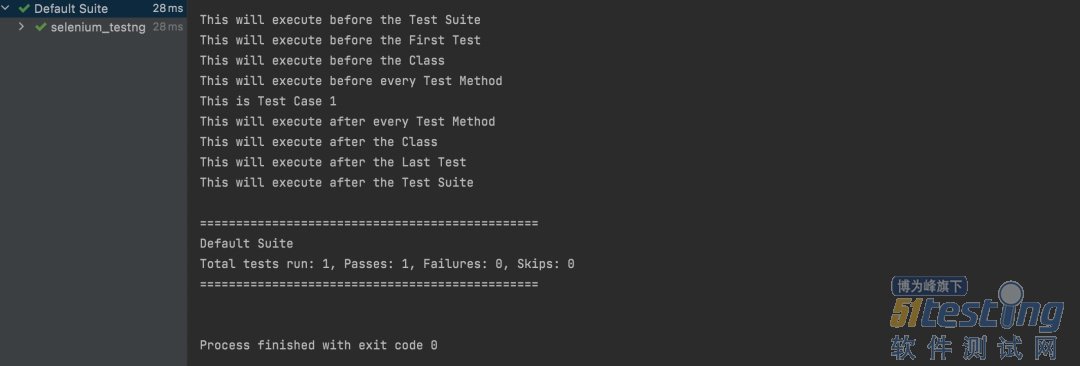
TestNG 注解具有预定义的执行层次结构,有助于执行测试代码。它们的执行优先级如下:

让我们看一下下面的代码示例,以更好地演示其层次结构。
package test;
import org.testng.annotations.AfterClass;
import org.testng.annotations.AfterMethod;
import org.testng.annotations.AfterSuite;
import org.testng.annotations.AfterTest;
import org.testng.annotations.BeforeClass;
import org.testng.annotations.BeforeMethod;
import org.testng.annotations.BeforeSuite;
import org.testng.annotations.BeforeTest;
import org.testng.annotations.Test;
public class TestNGAnnotationsHierarchy {
@Test
public void testCase1() {
System.out.println("This is Test Case 1");
}
@Test
public void testCase2() {
System.out.println("This is Test Case 2");
}
@BeforeMethod
public void beforeMethod() {
System.out.println("This will execute before every Test Method");
}
@AfterMethod
public void afterMethod() {
System.out.println("This will execute after every Test Method");
}
@BeforeClass
public void beforeClass() {
System.out.println("This will execute before the Class");
}
@AfterClass
public void afterClass() {
System.out.println("This will execute after the Class");
}
@BeforeTest
public void beforeTest() {
System.out.println("This will execute before the First Test");
}
@AfterTest
public void afterTest() {
System.out.println("This will execute after the Last Test");
}
@BeforeSuite
public void beforeSuite() {
System.out.println("This will execute before the Test Suite");
}
@AfterSuite
public void afterSuite() {
System.out.println("This will execute after the Test Suite");
}
}
本文内容不用于商业目的,如涉及知识产权问题,请权利人联系51Testing小编(021-64471599-8017),我们将立即处理


