

3. ExtentReports klov 实现
3.1 Klov 安装
最新版官方提供的是Docker环境,由于目前手头没有 Docker 环境,我这里用了老版本 klov-0.1.1.jar ,jar包安装
1. 安装mongoDB并启动
2. 安装redis并启动(可选)
3. 下载klov jar包,修改其配置文件 application.properties:
# klov
application.name=Klov
server.host=localhost
server.port=8081
# data.mongodb
spring.data.mongodb.host=*
spring.data.mongodb.port=27017
spring.data.mongodb.database=klov
# data.rest
spring.data.rest.basePath=/rest
spring.data.rest.default-page-size=6
# redis, session
use.redis.session.store=false
spring.redis.host=*
spring.redis.port=6379
spring.redis.ssl=false
spring.redis.database=0
spring.session.store-type=redis
server.session.timeout=-1
# users
server.admin.name=admin
server.admin.key=$2a$10$I/5TFi6BrHChUghTZEZfCO82txzu8L5brcK0CxhS3m.V6glfj2vZe
# storage
file.storage.location=./upload/reports/
# schedulers
scheduler.jobs.enabled=false
scheduler.job.builds.retain.count=100
# mail,有这些设置才能重置忘记的密码。
spring.mail.host=
spring.mail.port=
spring.mail.username=
spring.mail.password=
spring.mail.properties.mail.smtp.ssl.enable=true
spring.mail.properties.mail.smtp.auth=true
spring.mail.test-connection=true
如未安装 Redis,只需在 application.properties 以下位置取消注释:
spring.autoconfigure.exclude=org.springframework.boot.autoconfigure.session.SessionAutoConfiguration
4. 启动Klov,并验证
java -jar klov-x.x.x.jar
打开http://127.0.0.1:8081/password,输入admin/password,即可登录,至此Klov服务端已经成功运行。
3.2 客户端测试接入 Klov 服务器
1. 在pom.xml文件中配置依赖
<properties>
<java.version>1.8</java.version>
<mongodb.version>3.6.4</mongodb.version>
</properties>
......
<!-- https://mvnrepository.com/artifact/com.aventstack/klov-reporter -->
<dependency>
<groupId>com.aventstack</groupId>
<artifactId>klov-reporter</artifactId>
<version>5.0.8</version>
</dependency>
<dependency>
<groupId>org.mongodb</groupId>
<artifactId>mongodb-driver</artifactId>
<version>${mongodb.version}</version>
</dependency>
<dependency>
<groupId>org.mongodb</groupId>
<artifactId>bson</artifactId>
<version>${mongodb.version}</version>
</dependency>
2. 在ExtentManager类中增加klov接入代码
public class ExtentManager {
//生成的路径以及文件名
private static final String OUTPUT_FOLDER = "test-output/";
private static final String FILE_NAME = "index5.html";
private static ExtentReports extent;
public static ExtentReports getInstance() {
if (extent == null)
createInstance();
return extent;
}
public static void createInstance() {
//文件夹不存在的话进行创建
File reportDir = new File(OUTPUT_FOLDER);
if (!reportDir.exists() && !reportDir.isDirectory()) {
reportDir.mkdir();
}
extent = new ExtentReports();
extent.attachReporter(createSparkReporter(OUTPUT_FOLDER + FILE_NAME), createKlovReporter());
//extent.setSystemInfo("os", "Linux");
extent.setReportUsesManualConfiguration(true);
}
private static ExtentSparkReporter createSparkReporter(String filePath) {
ExtentSparkReporter spark = new ExtentSparkReporter(filePath);
spark.config(
ExtentSparkReporterConfig.builder()
.theme(Theme.DARK)
.reportName("ISTP API自动化测试报告")
.documentTitle("ISTP API自动化测试报告")
.build());
return spark;
}
private static ExtentKlovReporter createKlovReporter() {
// 创建一个KlovReporter对象
ExtentKlovReporter klov = new ExtentKlovReporter("zuozewei-test");
klov
.initKlovServerConnection("10.16.55.95:8081")
.initMongoDbConnection("10.16.55.95", 27017);
return klov;
}
}
3. 运行测试,从标准输出可以看到Klov相关日志
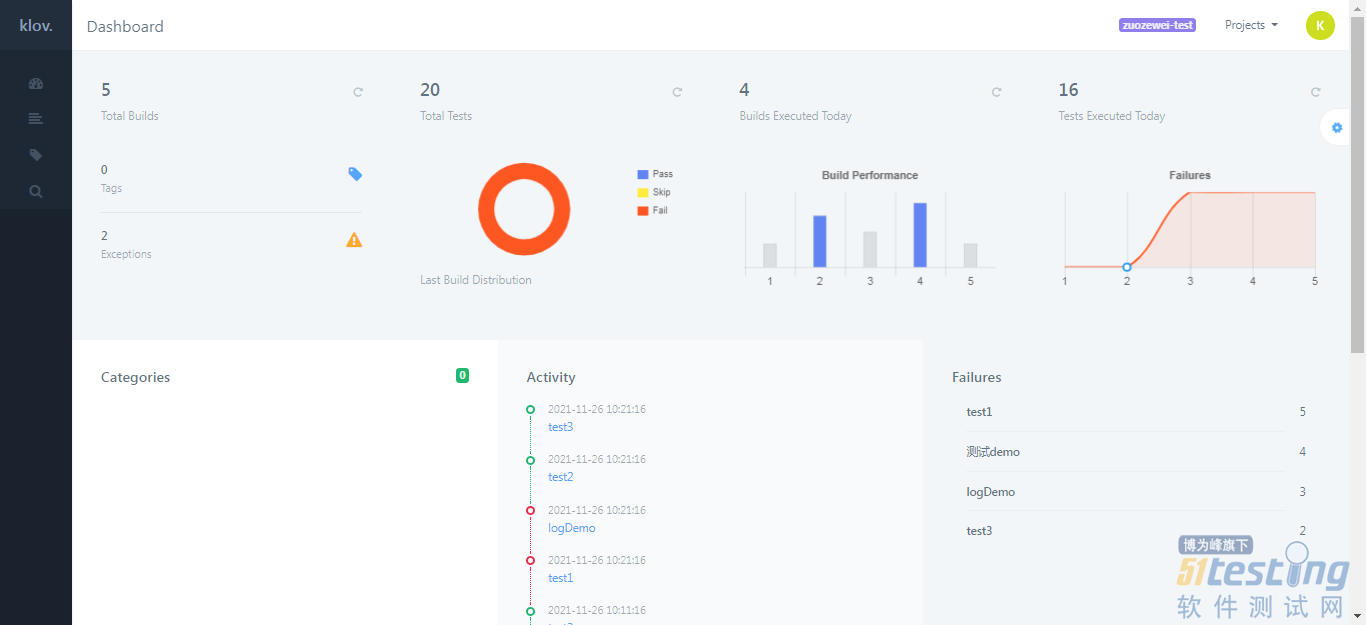
4. 刷新Klov,可以看到相关数据,详见下图:

本文内容不用于商业目的,如涉及知识产权问题,请权利人联系51Testing小编(021-64471599-8017),我们将立即处理


