

以前开发UiAutomator都是在Eclipse环境下进行的,最近经朋友介绍,由于UiAutomator2的出现,开发平台如果能够移植到Android Studio会变得非常的容易。在平台移植过程中参考了网上许多资料,都不太系统,现在我将如何在Android Studio环境下建立UiAutomator环境给大家做个详细的介绍。
1、JDK的安装
Android Studio也是基于JAVA开发的,所以同样要下载JDK版本,由于这里我们需要使用UiAutomator2,所以建议大家安装JDK8.0。安装后JDK完毕需要配置环境变量,首先建立%JAVA_HOME%、然后在PATH中加入:“JAVA_HOME%\jre\bin;%JAVA_HOME%\bin\;”,最后在CLASSPATH 中加入:“%JAVA_HOME%\lib\dt.jar;%JAVA_HOME%\lib\tools.jar;”。环境设置完毕,打开cmd,输入:java -version命令,如果在返回页面出现如下内容:
C:\Users\Jerry>java -version
java version "1.8.0_131"
Java(TM) SE Runtime Environment (build 1.8.0_131-b11)
Java HotSpot(TM) 64-Bit Server VM (build 25.131-b11, mixed mode)
说明配置正确。
2、SDK安装
下载SDK文件,配置环境变量。首先建立%ANDROID_HOME%,然后在PATH中加入“%ANDROID_HOME%\platform-tools;%ANDROID_HOME%\tools;”,运行命令adb devices检查是否配置正确。
利用Android Studio环境下建立UiAutomator环境,需要升级sdk中的tools目录,升级方法如下:
1)cd %ANDROID_HOME%;
2)把目录名tools改为too;l
3)cd tool/bin;
4)执行:sdkmanager –update;
5)在update工程中,在%ANDROID_HOME%目录下产生新的文件夹tools;
6)update完毕把新产生的tools目录下所有文件拷贝到tool下;
7)删除tools目录,把tool目录改名为tools;
8)cd %ANDROID_HOME%/tools/bin;
9)执行:sdkmanager ----licenses。
在这里,我特别提醒,如果你还是不改用Android Studio,SDK update后,使用Eclipse是会有问题的。
3、建立Android Studio的SDK
打开Android Studio,通过菜单"File"->"Other Settings"->"Default Project Structure",选择刚才下载的SDK路径。

4、建立测试工程
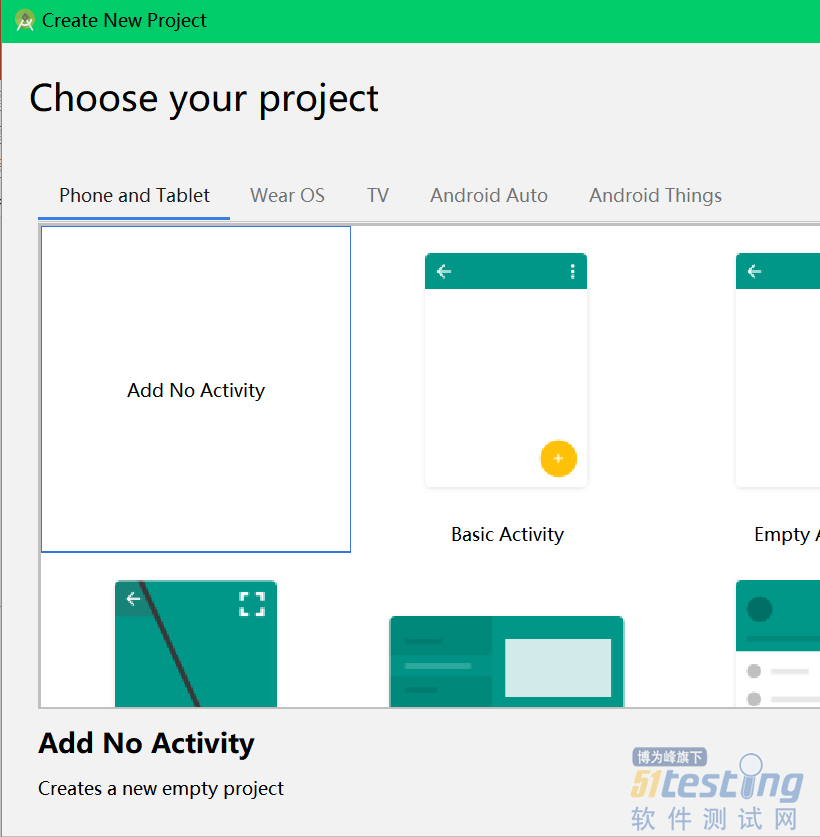
通过菜单"File"->"New"->"New Project",如图建立如下Add No Activity:
进入下一步,进行如下图配置:
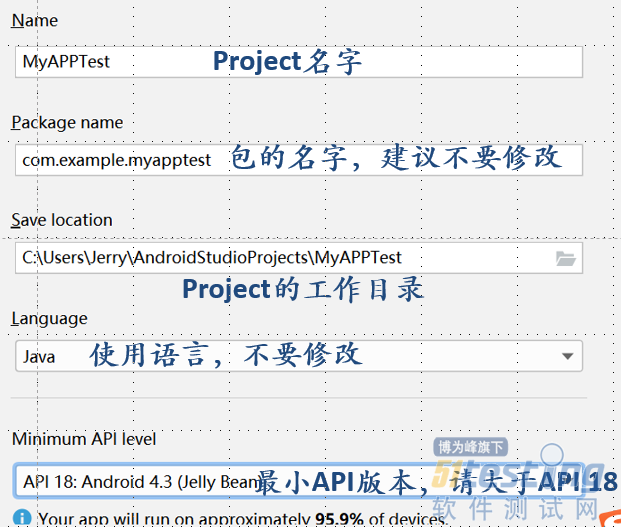
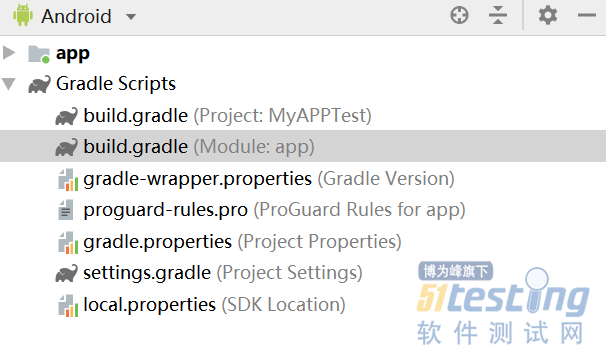
在这里需要注意Minimum API level不要小与18.接下来配置成功,把项目格式改为按Android视图模式查看,然后打开build.gradle。发现文件最后有如下配置:
dependencies { implementation fileTree(dir: 'libs', include: ['*.jar']) implementation 'com.android.support:appcompat-v7:27.1.1' testImplementation 'junit:junit:4.12' androidTestImplementation 'com.android.support.test:runner:1.0.2' androidTestImplementation 'com.android.support.test.espresso:espresso-core:3.0.2' } |
Android Studio的类配置通过这里进行配置。一个Android Studio项目分层三个区域:普通单元测试区、Android单元测试区以及Android产品代码区;命令androidTestImplementation '包名'只能在Android单元测试区使用,testImplementation '包名'可以在“普通单元测试区”和“Android单元测试区”使用;而命令implementation '包名'只能在Android产品代码区使用。(如果你使用的是Android Studio 2.X版本,这里的Implementation都要改为Compile,即androidTestCompile '包名'、testCompile '包名'、compile '包名')。因为我们的UiAutomation是属于Android单元测试的,所以通过命令:androidTestImplementation 'com.android.support.test.uiautomator:uiautomator-v18:2.1.1'加在命令最后,即:
dependencies { implementation fileTree(dir: 'libs', include: ['*.jar']) implementation 'com.android.support:appcompat-v7:27.1.1' testImplementation 'junit:junit:4.12' androidTestImplementation 'com.android.support.test:runner:1.0.2' androidTestImplementation 'com.android.support.test.espresso:espresso-core:3.0.2' androidTestImplementation 'com.android.support.test.uiautomator:uiautomator-v18:2.1.1' } |
如果你希望把你加入的与系统生成的独立开来,下面写法也是正确的:
dependencies { implementation fileTree(dir: 'libs', include: ['*.jar']) implementation 'com.android.support:appcompat-v7:27.1.1' testImplementation 'junit:junit:4.12' androidTestImplementation 'com.android.support.test:runner:1.0.2' androidTestImplementation 'com.android.support.test.espresso:espresso-core:3.0.2' } dependencies { androidTestImplementation 'com.android.support.test.uiautomator:uiautomator-v18:2.1.1' } |
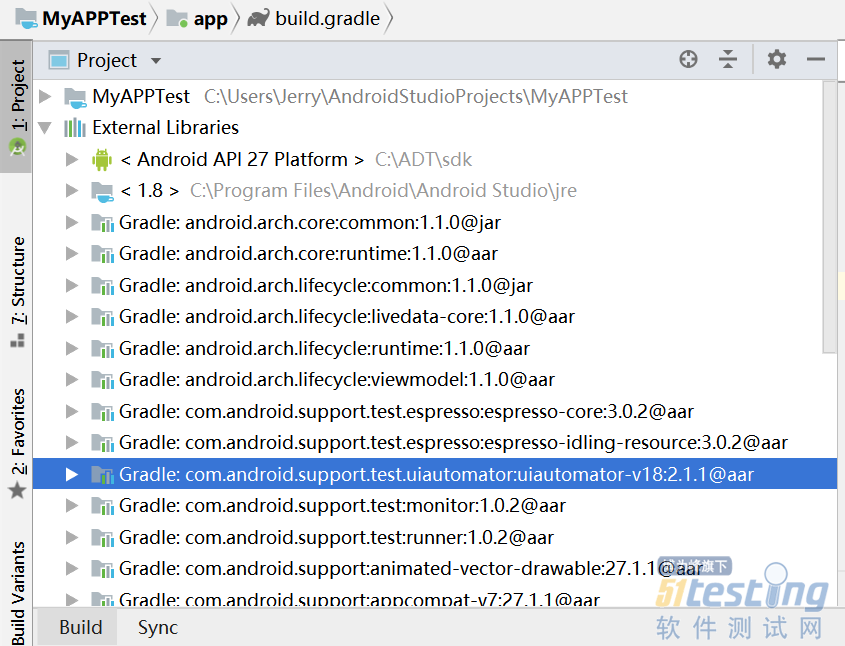
同步完成,切换到Project视图模式,你会在External Libraries 中找到相应的类。
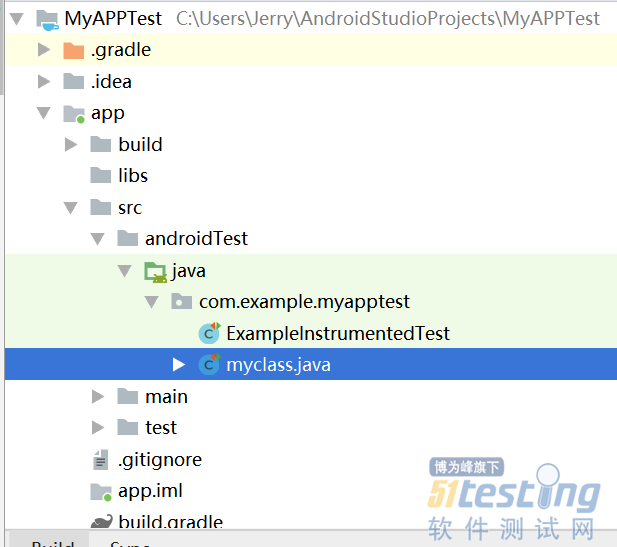
最后我们在Android单元测试区建立我们的测试代码myclass。(androidTest为Android单元测试区、test普通测试区、main为Android代码开发区)
如下是一个最简单的UiAutomator测试程序。
package com.example.myapptest; import android.app.Instrumentation; import android.support.test.runner.AndroidJUnit4; import android.test.InstrumentationTestCase; … import org.junit.Test; import org.junit.runner.RunWith; @RunWith(AndroidJUnit4.class) public class myclass extends InstrumentationTestCase { public UiDevice mDevice; public Instrumentation instrumentation; @Test public void testHome() { instrumentation = InstrumentationRegistry.getInstrumentation(); UiDevice.getInstance(instrumentation).pressHome(); } |
5、UiAutomator2.0 与UiAutomator1.0区别
1)UiAutomator2.0采用JUnit4测试框架。在这里特别注意:
2)在UiAutomator1.0中继承的是UiAutomatorTestCase,而2.0继承的是InstrumentationTestCase
3)在UiAutomator1.0中使用getUiDevice()方法获得UiDevice对象,而在2.0中已经不再存在getUiDevice()方法了,而2.0采用instrumentation = InstrumentationRegistry.getInstrumentation();UiDevice mdevice = UiDevice.getInstance(instrumentation)获得UiDevice对象。
4)在UiAutomator2.0中添加了By Selector类、By类和UiObject2类对象,UiObject2类作用如同UiObject,By Selector类、By类一般配合UiObject2获取对象使用。类似UiSelector类的作用。但是UiObject2类对于SDK一些虚拟设备中的控件的操作会出现一些意想不到的空指针异常,估计是这个类还不太完善,我在近期是不会使用的。
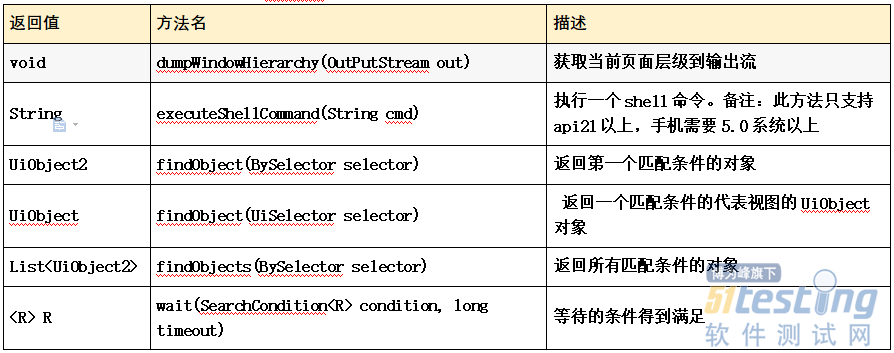
5)在2.0中UiDevice 类增加了如下的方法:
对于UiAutomator类的介绍网上的资料已经很全了,我不做更多的介绍。
版权声明:本文出自51Testing会员投稿,51Testing软件测试网及相关内容提供者拥有内容的全部版权,未经明确的书面许可,任何人或单位不得对本网站内容复制、转载或进行镜像,否则将追究法律责任。


