

随着深度学习算法的兴起和普及,人工智能领域取得了令人瞩目的进步,特别是在计算机视觉领域。21世纪的第二个十年迅速采用卷积神经网络,发明了最先进的算法,大量训练数据的可用性以及高性能和高性价比计算的发明。计算机视觉中的一个关键概念是图像分类; 这是软件系统正确标记图像中主导对象的能力。
ImageAI是一个Python库,旨在帮助开发人员构建具有自包含计算机视觉功能的应用程序和系统。
1. 安装Python 3.5.1或更高版本和pip
(如果您已经安装了Python 3.5.1或更高版本,请跳过本节)
https://www.python.org/downloads/
2. 安装ImageAI依赖项
- Tensorflow pip3 install --upgrade tensorflow - Numpy pip3 install numpy - SciPy pip3 install scipy - OpenCV pip3 install opencv-python - Matplotlib pip3 install matplotlib - h5py pip3 install h5py - Keras pip3 install keras |
3. 安装ImageAI库
pip3 install https://github.com/OlafenwaMoses/ImageAI/raw/master/dist/imageai-1.0.2-py3-none-any.whl
4. 下载经过ImageNet-1000数据集训练的ResNet Model文件,并将文件复制到您的python项目文件夹。
https://github.com/fchollet/deep-learning-models/releases/download/v0.2/resnet50_weights_tf_dim_ordering_tf_kernels.h5
5. 创建一个名称为python的文件(例如“FirstPrediction.py”),并将下面的代码写入其中。
from imageai.Prediction import ImagePrediction import os execution_path = os.getcwd() prediction = ImagePrediction() prediction.setModelTypeAsResNet() prediction.setModelPath( execution_path + " esnet50_weights_tf_dim_ordering_tf_kernels.h5") prediction.loadModel() predictions, percentage_probabilities = prediction.predictImage("C:UsersMyUserDownloadssample.jpg", result_count=5) for index in range(len(predictions)): print(predictions[index] + " : " + percentage_probabilities[index]) |
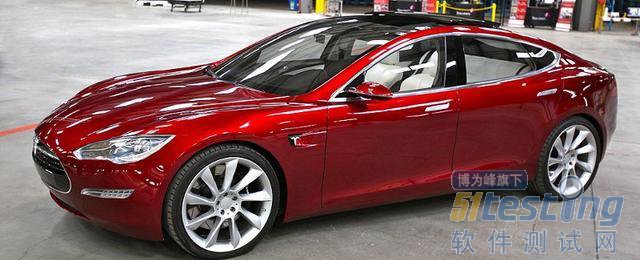
sample.jpg
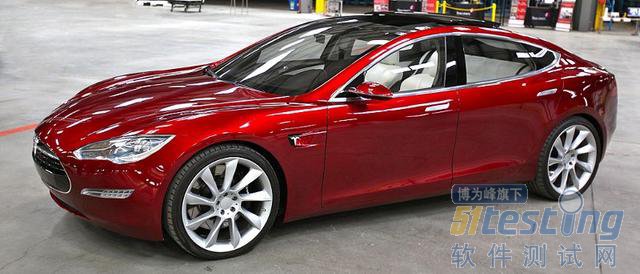
用10行Python代码进行图像识别
代码结果:
sports_car : 90.61029553413391 car_wheel : 5.9294357895851135 racer : 0.9972884319722652 convertible : 0.8457873947918415 grille : 0.581052340567112 |
代码说明
现在让我们分解代码,以便了解它是如何工作的。上面的代码工作如下:
from imageai.Prediction import ImagePrediction import os |
上面的代码导入了ImageAI ImagePrediction类和python os类。
execution_path = os.getcwd()
上面的代码创建一个变量,它保存对包含python文件(在本例中为FirstPrediction.py)和ResNet模型文件的路径的引用。
prediction = ImagePrediction() prediction.setModelTypeAsResNet() prediction.setModelPath(execution_path +“ resnet50_weights_tf_dim_ordering_tf_kernels.h5”) |
在上面的代码中,我们在第一行创建了一个ImagePrediction()类的实例,然后通过在第二行中调用.setModelTypeAsResNet(),将预测对象的模型类型设置为ResNet ,然后设置模型路径将预测对象复制到模型文件(resnet50_weights_tf_dim_ordering_tf_kernels.h5)的路径中,并将其复制到第三行的项目文件夹文件夹中。
| predictions, percentage_probabilities = prediction.predictImage("C:UsersMyUserDownloadssample.jpg", result_count=5) |
在上面的行中,我们定义了2个变量,它等于被调用来预测图像的函数,这个函数是 .predictImage()函数,我们在其中解析了图像的路径,并且还指出了我们想要的预测结果的数量有(从1到1000的值)解析result_count = 5 。所述 .predictImage()函数将返回与所述第一(2级阵列的对象的预测)是预测和所述第二(阵列percentage_probabilities)是相应的百分比概率为每个预测的阵列。
for index in range(len(predictions)): print(predictions[index] + " : " + percentage_probabilities[index]) |
上述行获取中的每个对象的预测阵列,并且还获得从相应百分比概率percentage_probabilities,最后打印二者的结果到控制台。
该 .predictImage()函数将在路径中的图像,也可以说明我们预计函数返回预测的数量(可选,默认为5)。ImageNet-1000数据集中有1000个项目,ResNet模型在该数据集上进行了训练,这意味着 .predictImage函数将返回1000个可能的预测值,并按其概率排列。
借助ImageAI,您可以轻松方便地将图像预测代码集成到您在python中构建的任何应用程序,网站或系统中。ImageAI库支持其他算法和模型类型,其中一些针对速度进行了优化,另一些针对精度进行了优化。借助ImageAI,我们希望支持计算机视觉的更多专业方面,包括但不限于特殊环境和特殊领域的图像识别以及自定义图像预测。
上文内容不用于商业目的,如涉及知识产权问题,请权利人联系博为峰小编(021-64471599-8017),我们将立即处理。


