

一.工具配置
NASM sourceforge下载地址
Bochs sourceforge下载地址
Cygwin(为了使用linux的一些常用命令)
二.20行代码的一个"操作系统"
代码boot.asm
mov ax,cs ; 告诉编译器程序加载到7c00处 mov ds,ax mov es,ax call DispStr ; 调用显示字符串例程 jmp $ DispStr: mov ax,BootMessage mov bp,ax ; es:bp = 串地址 mov cx,16 ; cx = 串长度 mov ax,01301h ; ah = 13,al = 01h mov bx,000ch ; 页号为0(bh=0) 黑底红字(b1=0ch,高亮) mov dl,0 int 10h ; 10h号中断 ret BootMessage: db "Hello,OS world!" times 510-($-$$) db 0 ; 填充剩下的空间,使生成的二进制代码恰好为512字节 dw 0xaa55 ; 结束标志 |
把这段代码用NASM编译一下:
nasm boot.asm -o boot.bin
在当前目录下边会生成一个512B的boot.bin.一个"操作系统"就已经完成了
三.使用bximage创建一个软盘映像
进入Bochs的安装目录,启动命令行(cmd或powershell)
画横线的表示要手动输入,箭头表示直接按回车键就好了

image.png
这样就会在当前目录生成a.img
四.使用Cygwin将引导扇区写进软盘
运行Cygwin.bat,进入boot.bin所在的目录(我存放在了bochs的安装目录),输入命令:
dd if=boot.bin of=a.img bs=512 count=1 conv=notrunc

image.png
五.使用Bochs启动刚刚写好的"操作系统"
1.写Bochs的配置文件bochsrc
bochsrc保存在Bochs的安装目录下
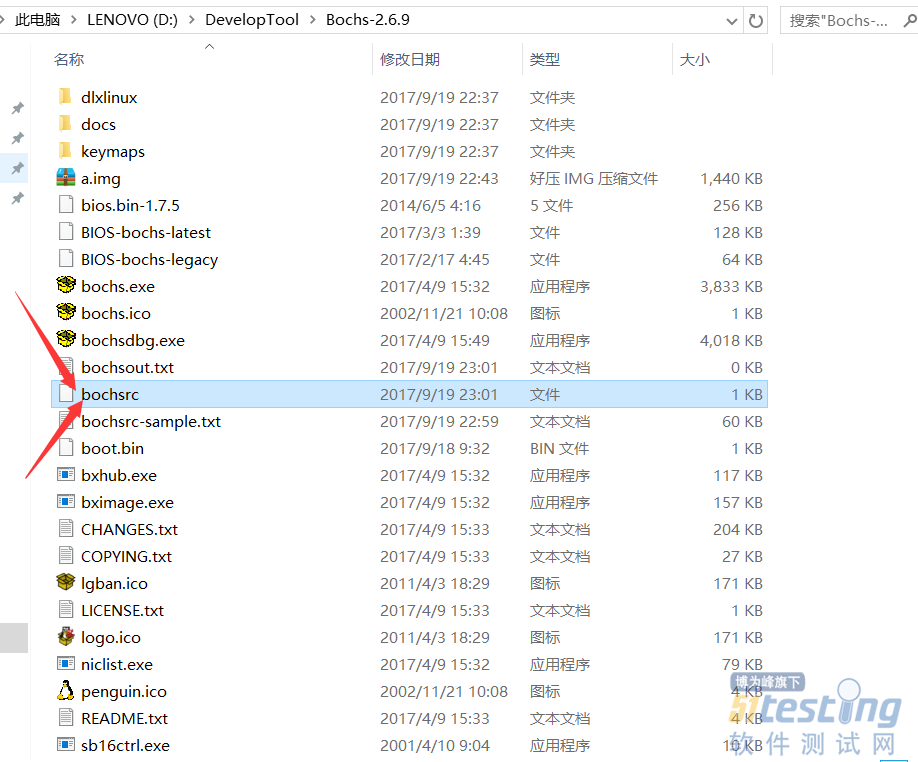
image.png
bochsrc代码
megs:32 romimage:file=$BXSHARE/BIOS-bochs-latest vgaromimage:file=$BXSHARE/VGABIOS-lgpl-latest floppya:1_44=a.img,status=inserted boot:floppy log:bochsout.txt mouse:enabled=0 keyboard: keymap=$BXSHARE/keymaps/x11-pc-de.map |
2.打开命令行(cmd或者powershell),运行Bochs
.\bochs.exe -f bochsrc
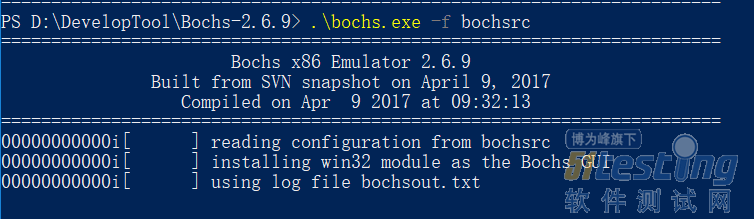
image.png
这样就可以看到已经成功运行啦!!!可以看到红色的输出"Hello,OS world!"

image.png


