

8.3.3 创建测试项目
具体步骤如下。
(1)打开Eclipse,选择"File"→"New"→"Project"菜单项,选择"Java Project"选项,新建项目名称为ATF,添加项目依赖的Jar包,如图8-9所示。这些jar包的功能如下。
log4j:日志处理。
poi:项目中使用的Excel,用来处理Excel的操作。
reportng:代替TestNG,并扩展TestNG的报表功能。
sqljdbc4:数据库驱动。
webdriver:存放Selenium 2的jar包。
saxon:解析XML文件。
jxl:配合poi解析Excel中的数据。

图8-9 项目依赖的Jar包
(2)由于项目使用Ant构建,因此需要添加build.xml文件,用于定义项目编译、打包和运行。build.xml文件内容如下:
<?xml version="1.0"?> <project default="run"> <property name="sourcepath" value="${basedir}/src" /> <taskdef resource="testngtasks" classpath="lib/testng-re-html.jar" /> <path id="runpath"> <pathelement location="bin" /> <path refid="cpath" /> </path> <target name="compilefirst" > <delete dir="bin" /> <mkdir dir="bin" /> <javac includeantruntime="on" destdir="bin" classpathref="cpath" srcdir="src" debug="true" encoding="UTF-8"> </javac> <java classpathref="runpath" classname="com.test.autotest.util.FileSystem"> <jvmarg value="-Dfile.encoding=UTF-8" /> </java> </target> <target name="compile" depends= "compilefirst" > <delete dir="bin" /> <mkdir dir="bin" /> <javac includeantruntime="on" destdir="bin" debuglevel="lines,vars,source" classpathref="cpath" srcdir="src" debug="true" encoding="UTF-8" > </javac> <copy file="src/log4j.properties" tofile="bin/log4j.properties" /> </target> <target name="run" depends="compile"> <delete dir="test-output" /> <delete dir="test-output/report" /> |
(3)在ATF项目中新建res文件夹,用来存放驱动文件。由于框架需要运行在不同的浏览器中,因此需要添加IE和Chrome的驱动,Selenium默认包含了Firefox驱动,因此不需要单独添加,添加完成后如图8-10所示。
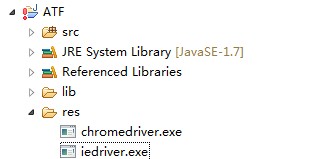
图8-10 存放驱动文件
(4)在ATF项目的根目录下,新建Prop.properties文件,配置运行时的参数,代码片段如下所示:
# Browser 类型 # 1 => FireFox # 2 => Chrome # 3 => IE BrowserCoreType = Chrome # Drivers路径 DriverPath = res/chromedriver.exe # 默认等待时间 Timeout = 20000 #数据库配置 insertSQL = NO dbUrl = jdbc:sqlserver://127.0.0.1:1433;DatabaseName=Test dbUser = admin dbPwd = 1234 |
其中各项参数说明如下:
BorwserCoreType:配置要运行的浏览器,可以是Chrome、IE或Firefox。
DriverPath:配置要运行的Driver路径。
Timeout:默认等待时间单位(ms)。
insertSQL:是否插入数据库。
dbURL:数据库URL。
dbUser:数据库用户名。
dbPwd:数据库密码。
(5)新建test-xml文件夹,在该文件夹下新建atf.xml文件,用于存放TestNG的配置信息,配置信息如下:
<suite reruntimes="1" name="demo" thread-count="10" parallel="tests" >
<test name="demo.xls" >
<classes>
<class name="com.test.autotest.run.TestNgRun1" />
</classes>
</test>
</suite>
(6)在ATF根目录下新建Action.properties文件,用于Excel中的测试组件和测试脚本相关联,在脚本开发过程中详细介绍该文件的内容。新建testcase文件夹用于存放Excel数据文件,最终框架结构如图8-11所示。

图8-11 框架结构
8.3.4 开发框架运行类
具体步骤如下。
(1)新建一个Java类读取项目中的配置文件,由于配置文件采用Key = Value的方式,例如项目ATF中的Prop.propeties中"BrowserCoreType = Chrome",等号左边的"BrowserCoreType"为Key,等号右边的"Chrome"为Key对应值。该类主要通过以下两个方法来获取配置文件信息。
getProperty(String key):通过传入的Key值,获取配置文件中Key对应的值,实现的代码如下:
public String getProperty(String property) { //把配置文件转换成Properties对象 Properties prop = getProperties(); String newProperty=""; try { newProperty = new String(property.getBytes("UTF-8"), "ISO8859_1"); } catch (UnsupportedEncodingException e) { // TODO Auto-generated catch block e.printStackTrace(); } //返回Key对应的值 return prop.getProperty(newProperty); } getProperties():把配置文件转换成一个properties对象,实现的代码如下: public Properties getProperties() { Properties prop = new Properties(); try { FileInputStream file = new FileInputStream(fileName); prop.load(file); file.close(); } catch (Exception e) { e.printStackTrace(); } return prop; } |
(2)编写框架运行类,此方法将运行一个业务流程,并执行业务流程中包含的组件脚本,该方法传入的参数包含如下。
FlowInfo:对应Excel中的业务流名称。
RunList:业务流程的运行次数。
传入业务流程和运行次数后,可以运行测试组件,该方法主要代码片段如下:
public void doTest(String FlowInfo, int runlist) { doBeforeClass(); long startTime = System.currentTimeMillis(); SimpleDateFormat createTime = new SimpleDateFormat ("yyyy-MM-dd HH:mm:ss"); FileUtil fileUtil = new FileUtil(); String[] FlowStr = FlowInfo.substring(FlowInfo.indexOf('[') +1,FlowInfo.indexOf(']')).split("-"); //获取该业务流的起始行 int left=Integer.parseInt(FlowStr[0]); //获取该业务流的结束行 int right=Integer.parseInt(FlowStr[1]); //获取Excel路径 String excelpath=this.NewExcel; //定义日志输出路径 String logfile = "log/"+getClass().getName(); //删除原来的日志 fileUtil.deleteFile(logfile); try { //循环组件 for(int row = left; row <= right; row++){ //判断组件是否为Enable,若是则运行 String actEnable = excelUtil.ReadExcel (excelpath, "Main", 6,row); if(actEnable.equalsIgnoreCase("Enable")){ //获取业务流的测试数据,otestmain对象存放Excel中的测试数据 int DataList = otestmain.getCurrentDataList (excelpath, runlist, row); dataList = DataList; //获取业务组件名称 String actionName = excelUtil.ReadExcel (excelpath,"Main", 3, row); //判断业务流是否运行 boolean isActRun = otestmain.isActionRun (excelpath, actionName, DataList); if(!isActRun){continue;} driver.SetActionName(excelpath, actionName, dataList); String act_name = ActionProp.getProperty(actionName); //根据组件名用反射机制调用组件 try { Class action = Class.forName(act_name); Class[] pType = new Class[] { AutoTestUtil.class, String.class, String.class,int.class }; Constructor ctor = action.getConstructor(pType); Object obj[] = new Object[] {driver, excelpath, actionName, DataList }; Object actobj = ctor.newInstance(obj); //运行组件,执行页面操作 Method mthd = actobj.getClass().getMethod("commonMthd"); //执行commonMthd方法 mthd.invoke(actobj); }catch (Exception e) {e.printStackTrace(); Assert.fail("use reflact to call action fail!"); } } } }catch (Exception e) { e.printStackTrace(); } } |
版权声明:51Testing软件测试网获电子工业出版社和作者授权连载本书部分章节。
任何个人或单位未获得明确的书面许可,不得对本文内容复制、转载或进行镜像,否则将追究法律责任。


