4. 往Bootstrap发送命令
既然任务队列已经初始化,与boostrap通信的socket也建立妥当了,那么现在就是时候看一个实例来看下appium server是如何在接受到appium client的rest命令后,往bootstrap那边去灌命令的了。
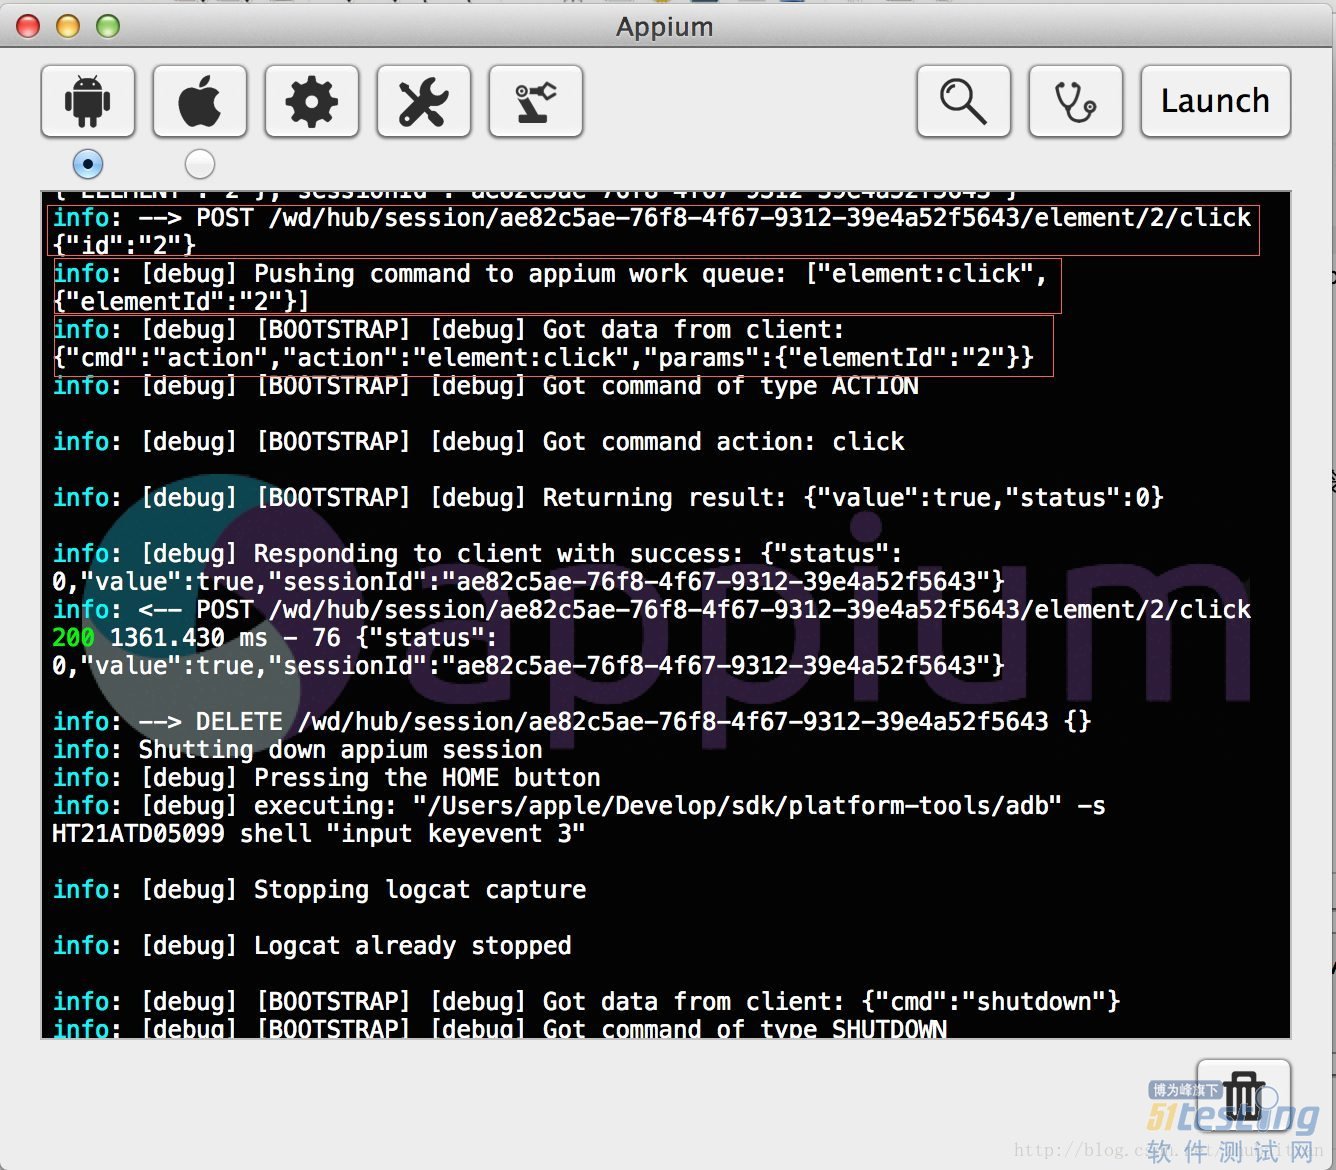
开始之前我们先看下debug log,看下appium client端发送过来的命令及相关的输出:

我们可以看到client端发送过来的命令是:
info: --> POST /wd/hub/session/ae82c5ae-76f8-4f67-9312-39e4a52f5643/element/2/click {"id":"2"}
那么我们参照路由routing表查找到对应的处理controller:
rest.post('/wd/hub/session/:sessionId?/element/:elementId?/click', controller.doClick);
对应的处理方法是controller.doClick。注意这里前面一部分是http request的body,后面一部分是params。
这里我们可以回顾下上面说过的打问好的是变量,会用真实的值进行替代的,如在我们的例子中:
sessionId:ae82c5ae-76f8-4f67-9312-39e4a52f5643
elementId: 2
从这些参数我们可以知道appium client端需要appium server帮忙处理的事情是:请在当前这个session中点击当前界面的bootstrap那边的控件哈稀表键值为2的控件(至于控件哈稀表这个概念如果不清楚的劳烦你先去看下本人的这篇文章《Appium Android Bootstrap源码分析之控件AndroidElement》)
ok,往下我们进入这个doClick方法进行分析:
exports.doClick = function (req, res) {
var elementId = req.params.elementId || req.body.element;
req.device.click(elementId, getResponseHandler(req, res));
};
第一行是把client传送过来的控件在bootstrap中的控件哈稀表key解析出来,至于为什么需要传两个一样的值然后进行或,我还没有看appium client端的代码,所以这里解析不了,也许今后有时间分析client代码的话会给大家说明白。但在这里你只需要知道这个elementId是怎么回事做什么用的就够了,这个不影响我们去理解appium server的运行原理。
第二行去调用nodejs提供的http request对象的device的click方法,这个device是什么呢?这个大家不记得的话请翻看第1节我们在初始化路由表的时候调用的getGlobalBeforeFilter方法中是把Appium对西那个的device对象赋予给了了这个request.device对象的:
req.device = appium.device;
而appium.device对象又是在第2节在start Appium实例时通过其configuration等一系列调用中初始化的,最终在我们安卓环境中就是初始化成Android这个设备类的实例,而Android这个类又extend了android-controller.js里面的所有方法:
...
, androidController = require('./android-controller.js')
...
_.extend(Android.prototype, androidController);
所以最终的click落实到了android-controller.js里面也就是androidController对象的click方法:
androidController.click = function (elementId, cb) {
this.proxy(["element:click", {elementId: elementId}], cb);
};
只有一行,调用的是proxy这个方法,跳进去:
exports.proxy = function (command, cb) {
logger.debug('Pushing command to appium work queue: ' + JSON.stringify(command));
this.push([command, cb]);
};
所做的事情就是直接把刚才那传命令作为一个task来push到上面提到的async.queue这个Apium Work Queue里面。
其实到了这里,click的处理已经完成任务了,因为这个queue不是由click的相关处理controller来控制的,它只是负责把这个任务加入到队列,而真正去队列取出任务进行执行的是我们上面第2节最后面提到的初始化async queue的时候的第一个参数,而那个参数是个匿名函数,没当有一个task进入队列需要执行之前都会去调用这个方法,我们回顾下:
Android.prototype.initQueue = function () { this.queue = async.queue(function (task, cb) { var action = task.action, params = task.params; this.cbForCurrentCmd = cb; if (this.adb && !this.shuttingDown) { this.uiautomator.sendAction(action, params, function (response) { this.cbForCurrentCmd = null; if (typeof cb === 'function') { this.respond(response, cb); } }.bind(this)); } else { this.cbForCurrentCmd = null; var msg = "Tried to send command to non-existent Android device, " + "maybe it shut down?"; if (this.shuttingDown) { msg = "We're in the middle of shutting down the Android device, " + "so your request won't be executed. Sorry!"; } this.respond({ status: status.codes.UnknownError.code , value: msg }, cb); } }.bind(this), 1); }; |
取得传进来的task相关键值,在我们这个例子中就是:
action:"element:click"
params:"{elementId:2"}
然后调用uiatutomator的sendAction方法,并把以上两个参数给传进去:
UiAutomator.prototype.sendAction = function (action, params, cb) {
if (typeof params === "function") {
cb = params;
params = {};
}
var extra = {action: action, params: params};
this.sendCommand('action', extra, cb);
};
将参数组合成以下并传给sendCommand:
参数1:‘action’
参数2:'{action:action,parames:{elementId:2}'
进入sendCommand:
UiAutomator.prototype.sendCommand = function (type, extra, cb) { ... else if (this.socketClient) { ... var cmd = {cmd: type}; cmd = _.extend(cmd, extra); var cmdJson = JSON.stringify(cmd) + "\n"; this.cmdCb = cb; var logCmd = cmdJson.trim(); if (logCmd.length > 1000) { logCmd = logCmd.substr(0, 1000) + "..."; } this.debug("Sending command to android: " + logCmd); this.socketClient.write(cmdJson); } ... } |
根据传进来的参数,最终组合成以下参数通过第3节初始化好的与bootstrap进行socket通信的socketClient来往bootstrap灌入命令:
{"cmd":"action","action":element:click","params":{"elementId":"2"}}
大家对比下图看下高亮圈住的最后一行由bootstrap打印出来的接收到的json命令字串,它们是绝对吻合的:
往下的事情就由bootstrap进行处理了,至于不清楚bootstrap怎么处理这些命令的,请查看我上一个bootstrap源码分析系列。
5. 小结
通过本文我们了解了appium server作为bootstrap的客户端,同时又作为appium client的服务器端,是如何处理从client来的命令然后组建成相应的json命令字串发送到bootstrap来进行处理的:
初始化REST路由表来接收appium client过来的REST命令调用并分发给相应的controller方法来进行处理
appium client发送命令之前会先触发一个创建session的请求,在路由表表现为“rest.post('/wd/hub/session', controller.createSession);”。对应的controller处理方法会开始初始化与bootstrap的连接
创建的session的过程会调用Appium类的start方法然后机型一系列的动作:
初始化设备类Android
用Async库的queue对象初始化Appium的Work Queue
创建adb实例并启动adb
安装测试apk
通过adb启动bootstrap
建立Appium Server和bootstrap的socket连接
...,等等等等
创建好连接后Appium Server就会接收client过来的命令,比如click,然后对应的controller处理方法就会建立命令对应的task并把它push到async queue里面
一旦有新task进入到async queue,对应的回调函数就会触发,开始往已经建立的与bootstrap的socket连接发送json字串命令